Detailed Rear Camera Installation
#1
 05-06-2007, 11:37 PM


Join Date: Mar 2007
Location: Canada - you know, God's country
Posts: 454
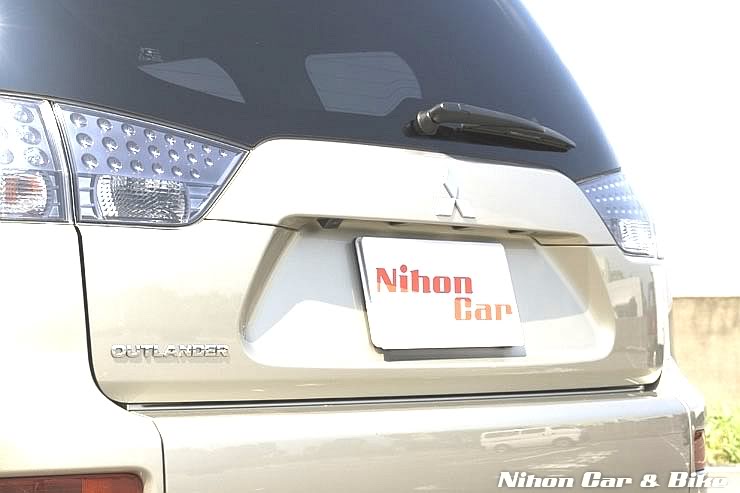
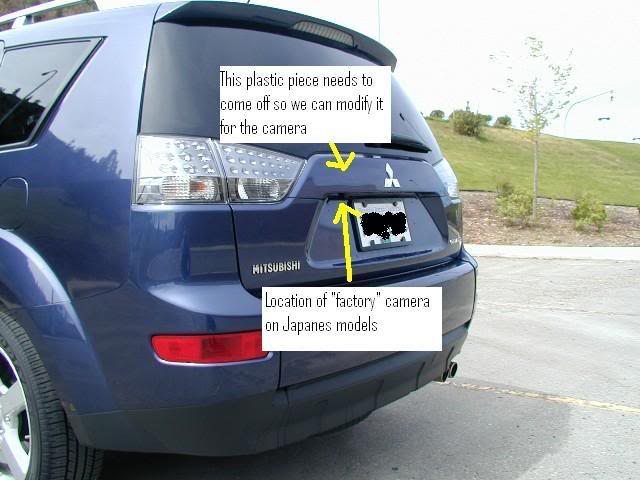
Okay, I finally got around to installing my rear camera this weekend. I really wanted a factory installed look so I started off by looking at the Japanese Outie for reference:
Overview:
I have broken this installation down into four parts - Part 1 details the mounting of the camera in the hatch. Part 2 details running the camera cable to the front via the headliner. It is a very easy install and in my opinion easier then going via the floor. Part 3 details the wiring including making/modifying the wiring harnesses for quick disconnect should you decide to remove at some point in the future. Part 4 is a wrap-up inlcuding a couple of pics of my install.
Part 1 - Mounting the Camera
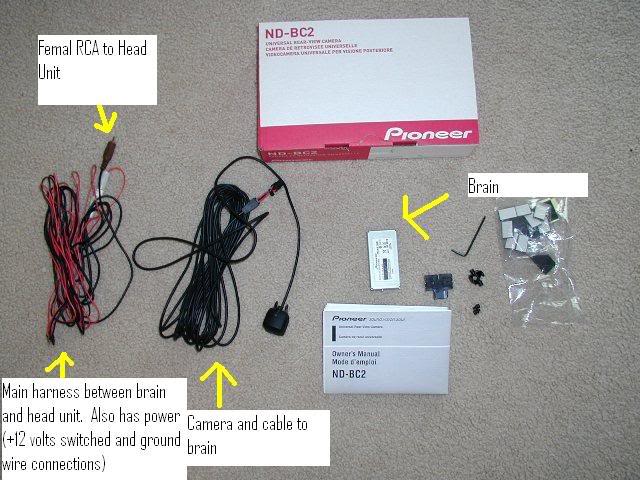
I went with the very slick Pioneer ND-BC2 - it is full colour CCD with low lux provisions and an incredible 135 degree wide angle and 100 degree vertical. It is among the very best cameras out there and well worth the extra bucks. You can buy cheap cameras off eBay but you get what you pay for. The ND-BC2 is MSRP $250 but you can find it on eBay for much less.
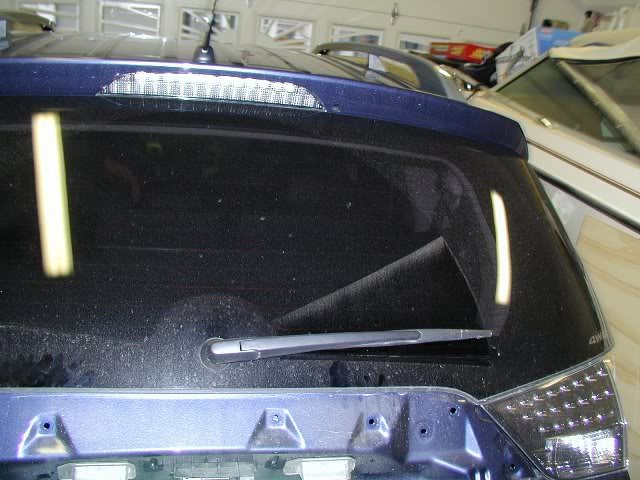
The rear of the vehicle pre-hack. This install requires a bit of patience and a steady hand.
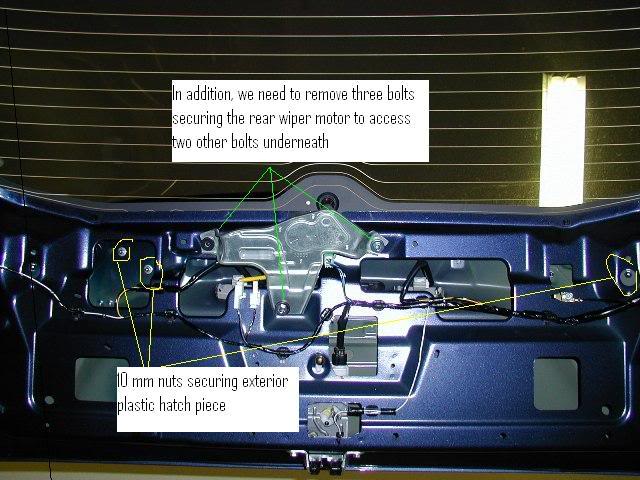
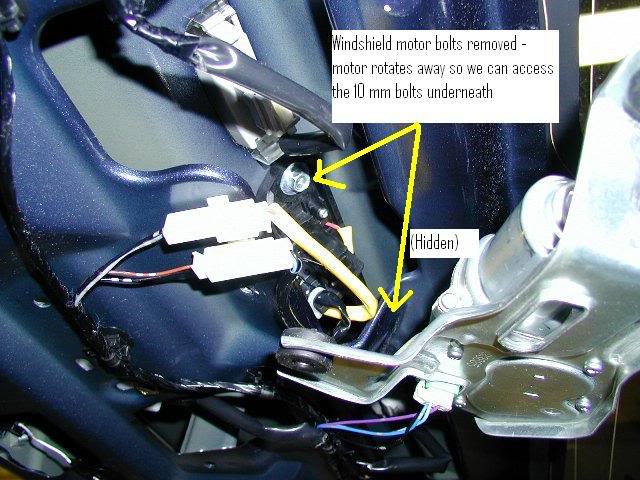
Once you remove the inside rear hatch panel, there are a number of nuts and two bolts that need to be removed in order to remove the exterior plastic trim piece. In order to access all the bolts, you will need to remove the rear wiper motor mount bolts and then rotate the wiper motor assembly.
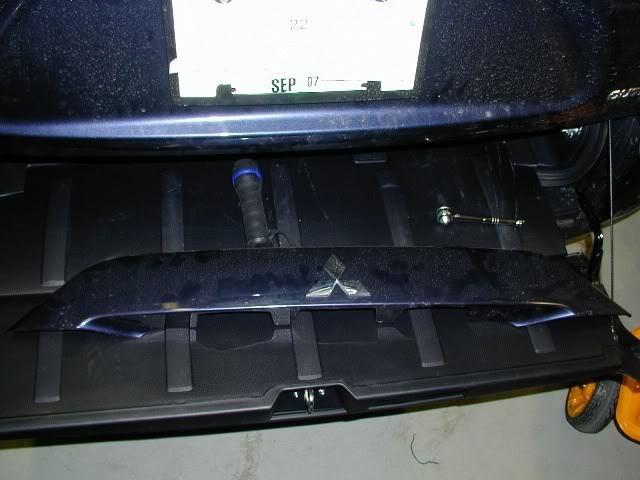
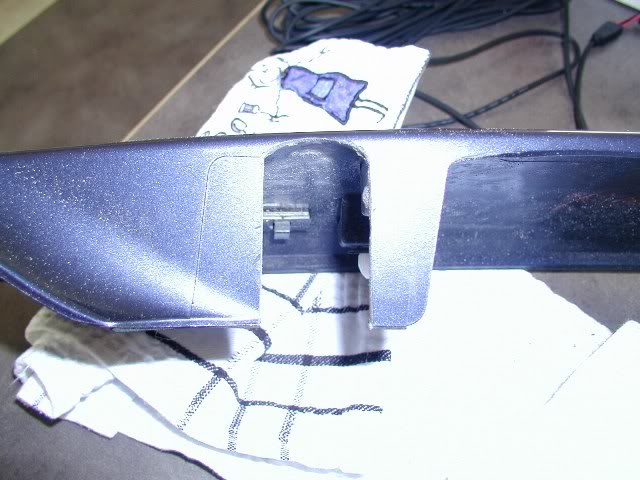
Okay, once that is done you can go ahead and remove the exterior trim piece. It is plast and has a number of snap connectors. Gently exert some pretty good pressure to free it from the hatch. Here is the bare hatch with the trim removed:
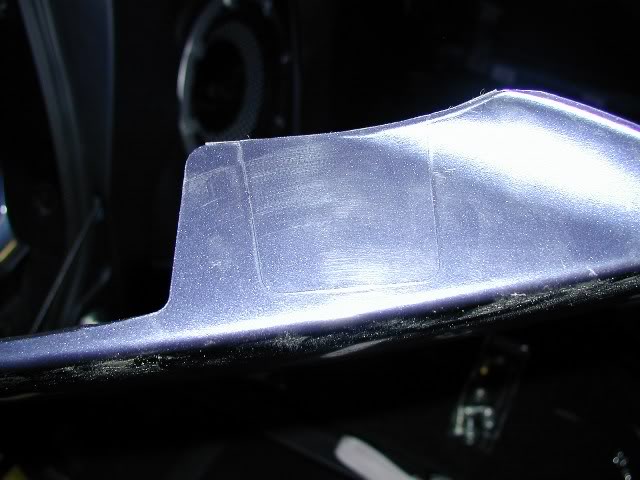
Said trim piece (pre-hack):
Alright, if you flip over the trim piece and loot at the underneath, you will see a scoredoutline of where the Japanese camera is mounted. You can also see this while the trim piece is still mounted on your Outie - it is right next to the left license plate light.
Pull out your Dremel and cutout an appropriate opening for your camera.
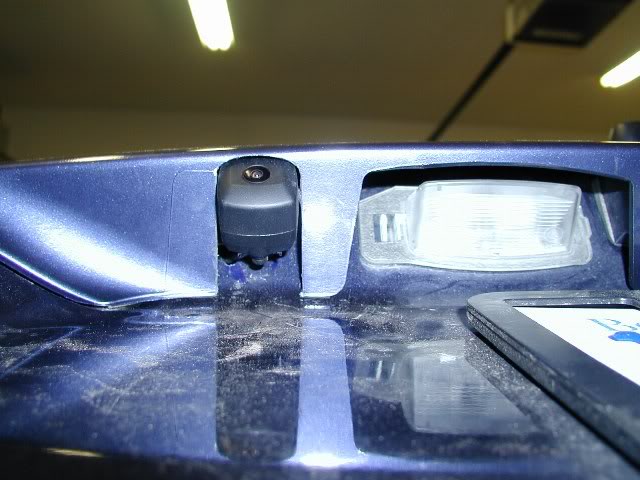
Test fitting camera:
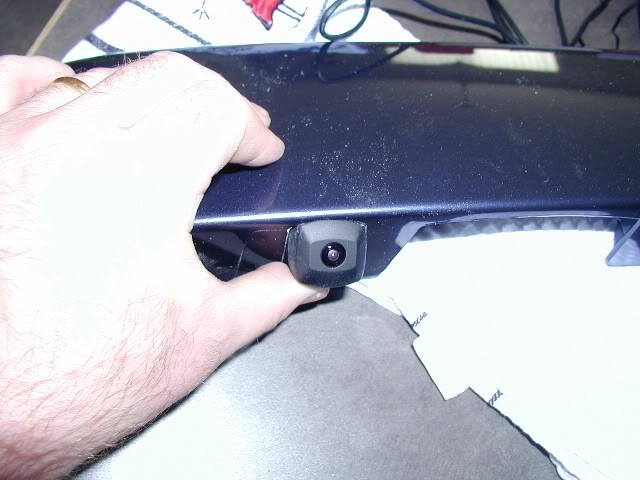
Once you are satisfied with your camera opening in the trim piece it is time to bore some holes to mount the camera bracket. Depending on how you want to mount your camera you likely need two holes - one for the bracket and one to pass the camera cable through. Once drilled, paint the inside of the holes so you don't have any bare metal exposed (Don't worry about keepoing this pretty, it all gets covered by the trim piece - see my screw up below).
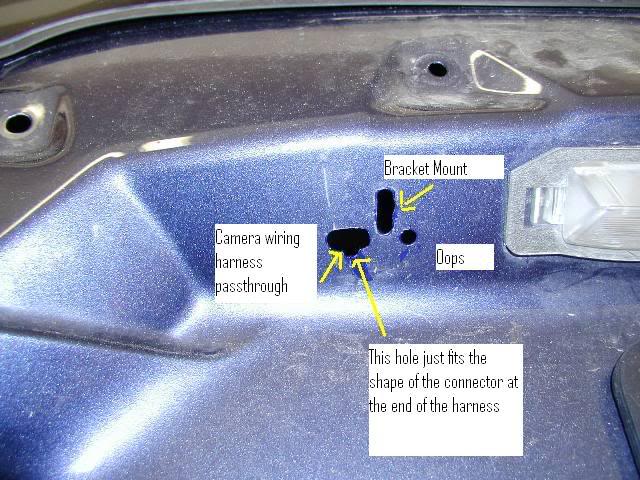
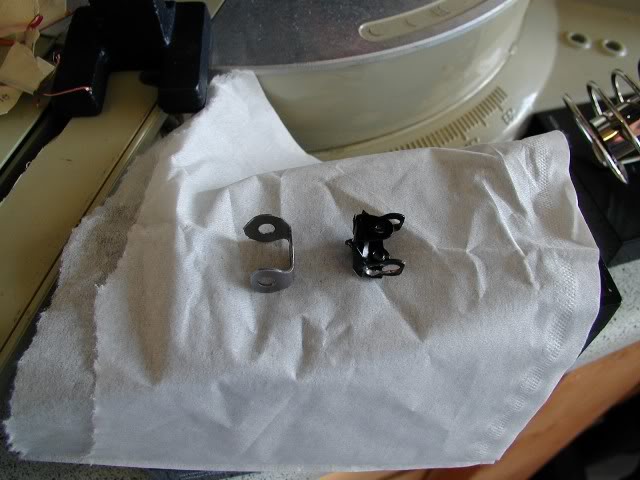
Fitting the camera bracket mount and trim piece is a lot of "trial an error" to get the mount in the ideal location. I originally tried modifying the bracket that came with the camera but found it caused the camera to stick out too far and pushed on the trim piece. I made my own bracket out of steel strapping you can get from any hardware store. Piece of cake and works very well. My bracket is on the left:
Final fitting and installation of camera:
Once you have the camera mounted and installed, it time to run the camera wiring around the hatch:
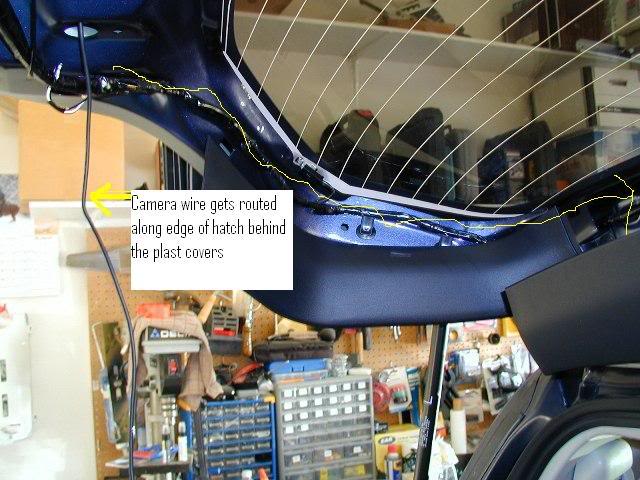
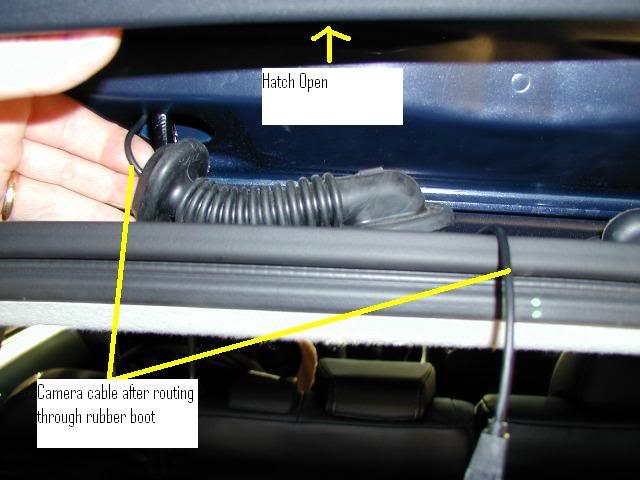
At the top of the hatch are two waterproof boots through which all wiring (as well as rear washer line) from the vehicle runs. Pop out the left boot and fish the camera wire through. The boot is very flexible and fairly short so you can use a stiff wire to fish the camera cable through.
Part 2 - Running the Camera Cable Under the Headliner
The first thing we need to do is release the headliner at the back of the vehicle. There are three fasteners back here but we only need to remove the left and centre fasteners. To remove the fasteners, wrap something flexible and strong (I used 20 gauge wire) around the fasteners and pull sharply down. They will pop right out.
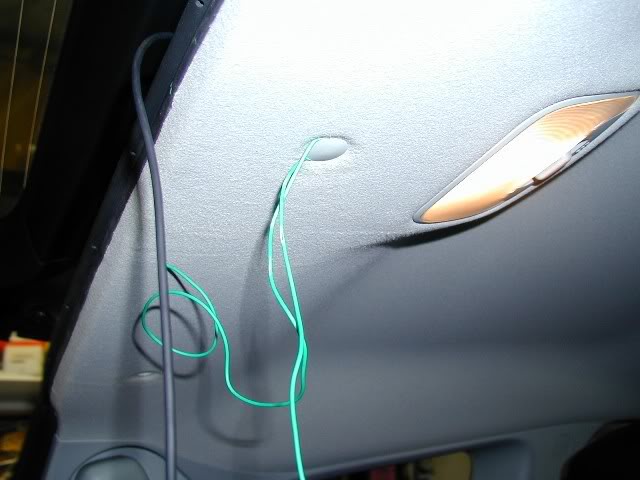
With the fasteners removed, feed the camera cable thorugh the boot hole and into the roof space. Running the cable under the headliner requires no tools and trust me when I say you don't need small hands and fingers to do this. Gently pry back the weather stripping and pull down the headliner to snag the cable - run it to the left side of the vehicle and past the rear pillar.
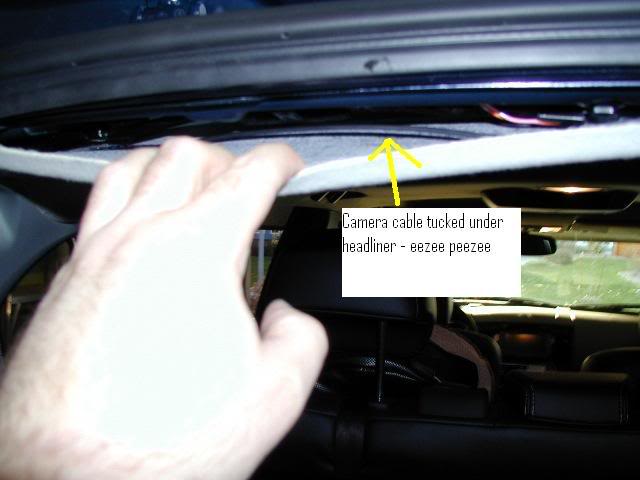
Keep working the cable down the length of the vehicle, gently prying the headliner when needed to feed the cable.
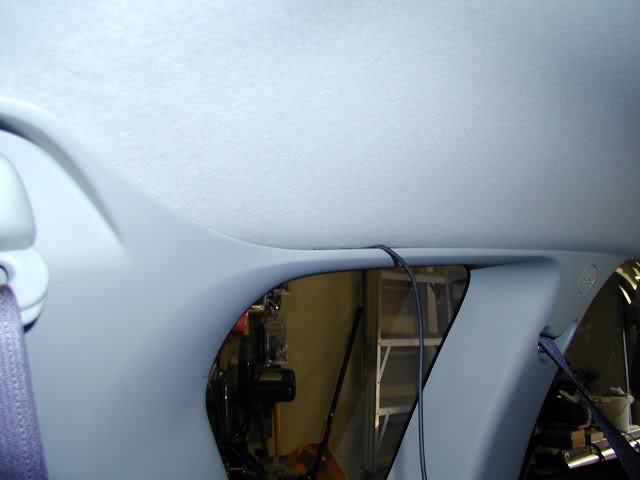
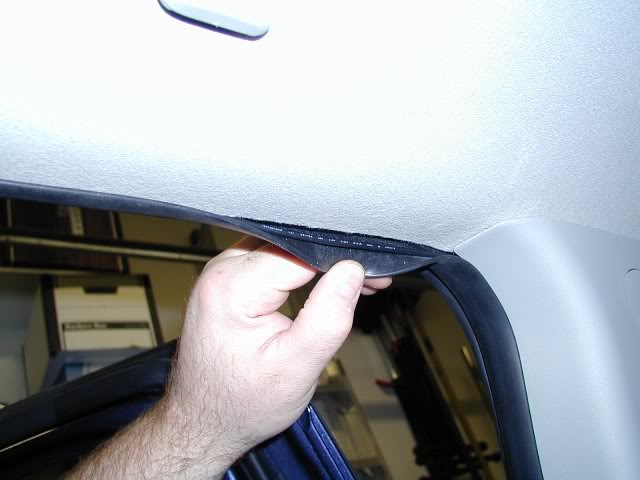
When you get to the rear door, you will need to pull back the weather stripping to expose the headliner edge. No worries, the weather strip is very flexible. Continue running the cable all the way to the A pillar and then run the cable down the inside of the A pillar - again you can just use your fingers to tuck the cable in behind the A pillar and down to the fuse box. Once you get the cable to the fuse box it is time to move on to wiring this puppy.
Part 3 - Wiring it Up
Here is a picture of the rear of the head unit - there are instructions somewhere around here on removing the head unit so just do a SEARCH. The key here is the connector in the upper right - it is not actually connected to anything so go ahead and unplug it and cut the five wires - we are going to make a video signal quick connect out of it. In addition, on the lower left of the unit is the connector which has switched power and a ground. We are going to splice in quick co
Overview:
I have broken this installation down into four parts - Part 1 details the mounting of the camera in the hatch. Part 2 details running the camera cable to the front via the headliner. It is a very easy install and in my opinion easier then going via the floor. Part 3 details the wiring including making/modifying the wiring harnesses for quick disconnect should you decide to remove at some point in the future. Part 4 is a wrap-up inlcuding a couple of pics of my install.
Part 1 - Mounting the Camera
I went with the very slick Pioneer ND-BC2 - it is full colour CCD with low lux provisions and an incredible 135 degree wide angle and 100 degree vertical. It is among the very best cameras out there and well worth the extra bucks. You can buy cheap cameras off eBay but you get what you pay for. The ND-BC2 is MSRP $250 but you can find it on eBay for much less.
The rear of the vehicle pre-hack. This install requires a bit of patience and a steady hand.
Once you remove the inside rear hatch panel, there are a number of nuts and two bolts that need to be removed in order to remove the exterior plastic trim piece. In order to access all the bolts, you will need to remove the rear wiper motor mount bolts and then rotate the wiper motor assembly.
Okay, once that is done you can go ahead and remove the exterior trim piece. It is plast and has a number of snap connectors. Gently exert some pretty good pressure to free it from the hatch. Here is the bare hatch with the trim removed:
Said trim piece (pre-hack):
Alright, if you flip over the trim piece and loot at the underneath, you will see a scoredoutline of where the Japanese camera is mounted. You can also see this while the trim piece is still mounted on your Outie - it is right next to the left license plate light.
Pull out your Dremel and cutout an appropriate opening for your camera.
Test fitting camera:
Once you are satisfied with your camera opening in the trim piece it is time to bore some holes to mount the camera bracket. Depending on how you want to mount your camera you likely need two holes - one for the bracket and one to pass the camera cable through. Once drilled, paint the inside of the holes so you don't have any bare metal exposed (Don't worry about keepoing this pretty, it all gets covered by the trim piece - see my screw up below).
Fitting the camera bracket mount and trim piece is a lot of "trial an error" to get the mount in the ideal location. I originally tried modifying the bracket that came with the camera but found it caused the camera to stick out too far and pushed on the trim piece. I made my own bracket out of steel strapping you can get from any hardware store. Piece of cake and works very well. My bracket is on the left:
Final fitting and installation of camera:
Once you have the camera mounted and installed, it time to run the camera wiring around the hatch:
At the top of the hatch are two waterproof boots through which all wiring (as well as rear washer line) from the vehicle runs. Pop out the left boot and fish the camera wire through. The boot is very flexible and fairly short so you can use a stiff wire to fish the camera cable through.
Part 2 - Running the Camera Cable Under the Headliner
The first thing we need to do is release the headliner at the back of the vehicle. There are three fasteners back here but we only need to remove the left and centre fasteners. To remove the fasteners, wrap something flexible and strong (I used 20 gauge wire) around the fasteners and pull sharply down. They will pop right out.
With the fasteners removed, feed the camera cable thorugh the boot hole and into the roof space. Running the cable under the headliner requires no tools and trust me when I say you don't need small hands and fingers to do this. Gently pry back the weather stripping and pull down the headliner to snag the cable - run it to the left side of the vehicle and past the rear pillar.
Keep working the cable down the length of the vehicle, gently prying the headliner when needed to feed the cable.
When you get to the rear door, you will need to pull back the weather stripping to expose the headliner edge. No worries, the weather strip is very flexible. Continue running the cable all the way to the A pillar and then run the cable down the inside of the A pillar - again you can just use your fingers to tuck the cable in behind the A pillar and down to the fuse box. Once you get the cable to the fuse box it is time to move on to wiring this puppy.
Part 3 - Wiring it Up
Here is a picture of the rear of the head unit - there are instructions somewhere around here on removing the head unit so just do a SEARCH. The key here is the connector in the upper right - it is not actually connected to anything so go ahead and unplug it and cut the five wires - we are going to make a video signal quick connect out of it. In addition, on the lower left of the unit is the connector which has switched power and a ground. We are going to splice in quick co


#5
05-07-2007, 08:16 AM

Definitely a GREAT write up! Thank you very much for sharing that with us and for taking the time to take pics and adding such great detail! Awesome job Rdenis, awesome job!
This deserves to be pinned to the top.
This deserves to be pinned to the top.

#7
05-07-2007, 09:54 AM
Absolutely, point them out to me and I'll stick 'em up there.
#8
05-07-2007, 03:20 PM

Excellent job!
I do have one question -- I have an 08 Lancer GTS that I'd like to install a backup cam in (why in a car? Just because I can.. haha). It uses the exact same head/navi unit as the outlander.
My headunit doesn't have a harness connected to the necessary port at all in the Lancer, and I can't quite tell which pins correspond with each wire color from your pictures. Would you be willing to draw/write up a quick pin diagram from the point of view of the head unit for those of us without wires to cut?
Thanks!
#9
05-07-2007, 04:30 PM
Join Date: Mar 2007
Location: Canada - you know, God's country
Posts: 454
Sure no problem. You should have 12 pins, 6 top and 6 bottom. The bottom row has no connections so ignore. Looking at the back of your nav unit top row of pins from left to right:
Pin 1 - not used (pink)
Pin 2 - not used (white)
Pin 3 - Video in (orange)
Pin 4 - not used (open)
Pin5 - Ground (black)
Pin6 - Camera recognition (yellow)
Colours in brackets indicate wire colour in harness connection. If you can't find a connector you can cheat by getting a couple of 3 pin or one 4 pin computer component connectors which are used to connect components to motherboards. Their pin alignment will fit perfectly and you can make your own harness out of this.