
2011 Outlander Audi Style Headlights


Thread Starter
|
Junior Member
Joined: Jul 2011
Posts: 28
Hey everyone, let me start by saying this is not really a tutorial, I felt like I did not take enough pics for it to be a tutorial, ALSO this is my first post of this nature so please bare with me.
So I have been searching the internet for audi style headlights for the 2011 Outlander Spot, and anyone like me who has been searhing has come up with NOTHING. So I was left with two choices....deal with it until some one comes out with them or do it myself. As you can see I went with do it my self. Now I will say it took me about 8 hours to do only because I did not want to screw and I also painted.
Ok so I started by removing the bumper and the headlights
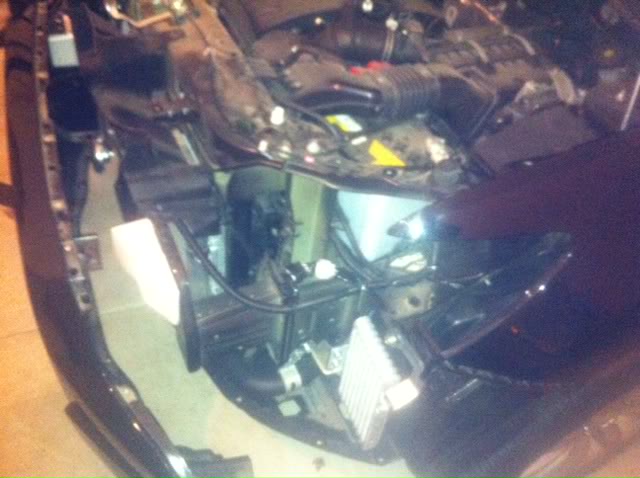
If you search the forum, there is a service book you can download. I pretty much followed that to see how to get everything off. It was pretty easy to remove
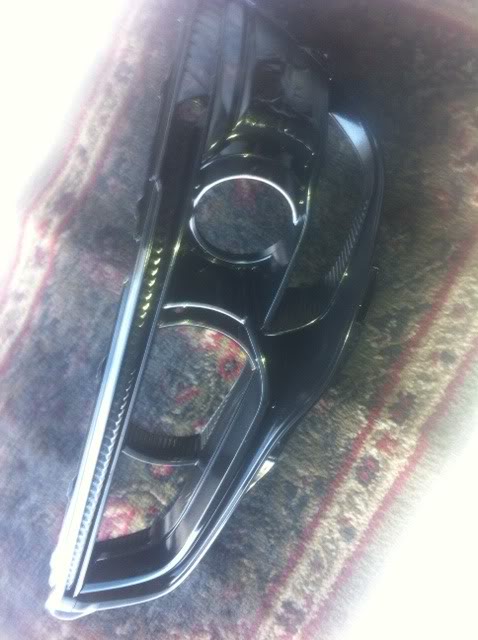
Here is the healight removed
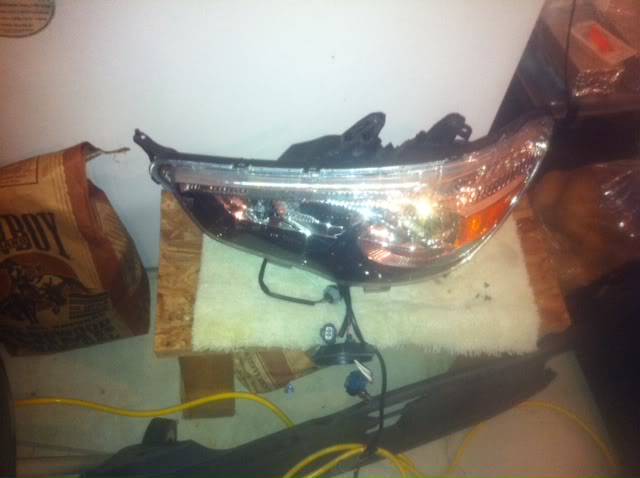
My Outlander has factory HID lights installed (this is part of the reason for the lenghty time it took me) I was afraid to remove the light because I thought I would mess it up, thus preventing me from putting it in the oven to melt the factory seal. After about an hour of using a blow dryer and getting no where I decided the hell with it, and removed the hid light and battery attached at the bottom. (Sorry I have no pics of this)
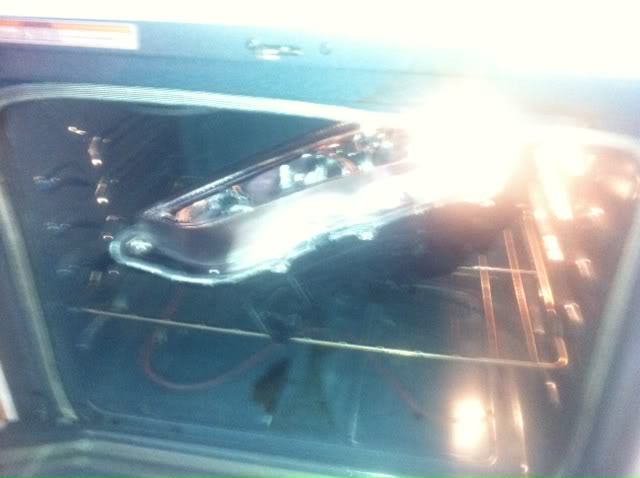
So I baked the healight at 250 for about 5 minutes to melt the seal down
Next I grabbed some gloves and began to open the headlight, here is the healight opened

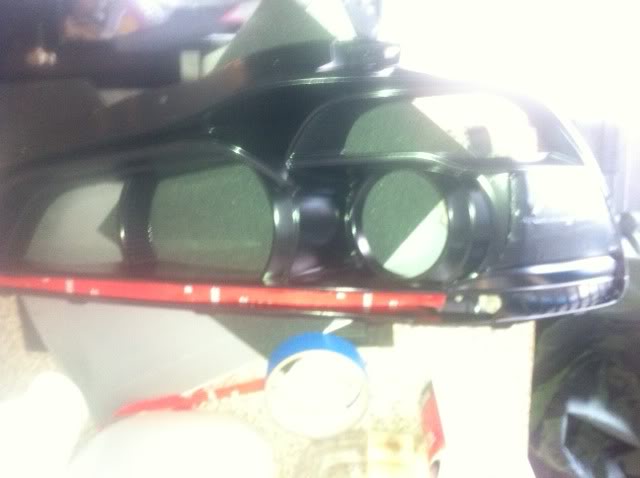
Here you have three parts to the healight, I removed the screws that held the chrome housing to the lens
Next I painted the chrome housing black (My preference)
After drying I layed down 3M double sided tape in the top opening
I also drilled a hole for the led strip wire as I did not want to block the city lights hole
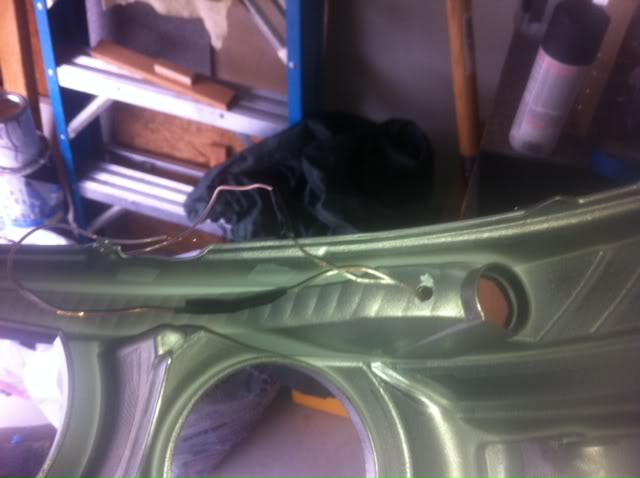
Next I applied the led strip lights (I got mines off of ebay)

Like i said I did not take enough pics. But I put everything back togther. To melt the factory seal back down just place the back part of housing back into the oven for 5 mintues and reassemble.
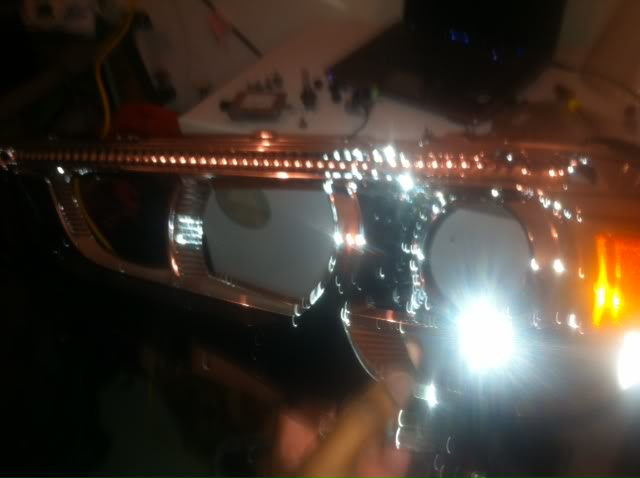
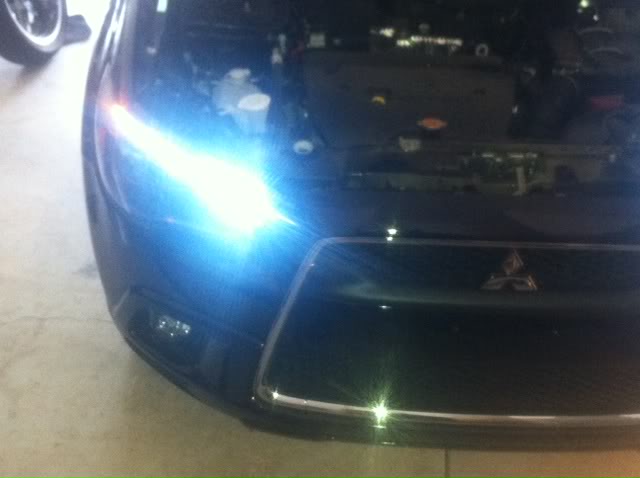
Here is the finished product (I'll take some better pics tonight)
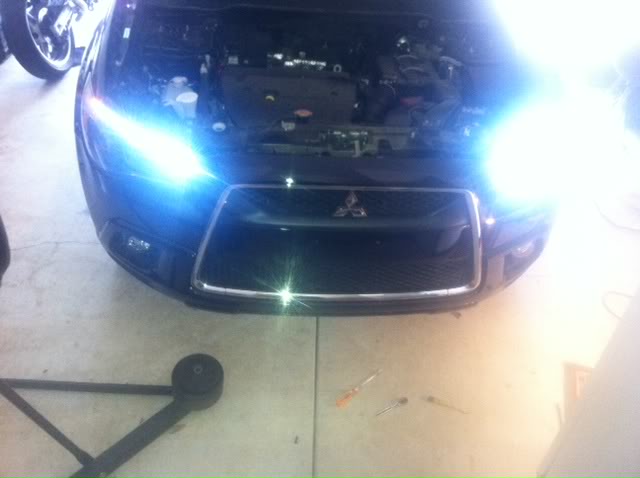
I will post how I wired them etc. later tonight. Any question just let me know and I will try and answer them to the best of my knowledge.
Overall I like it, and it looks really cool at night and during the day.
So I have been searching the internet for audi style headlights for the 2011 Outlander Spot, and anyone like me who has been searhing has come up with NOTHING. So I was left with two choices....deal with it until some one comes out with them or do it myself. As you can see I went with do it my self. Now I will say it took me about 8 hours to do only because I did not want to screw and I also painted.
Ok so I started by removing the bumper and the headlights
If you search the forum, there is a service book you can download. I pretty much followed that to see how to get everything off. It was pretty easy to remove
Here is the healight removed
My Outlander has factory HID lights installed (this is part of the reason for the lenghty time it took me) I was afraid to remove the light because I thought I would mess it up, thus preventing me from putting it in the oven to melt the factory seal. After about an hour of using a blow dryer and getting no where I decided the hell with it, and removed the hid light and battery attached at the bottom. (Sorry I have no pics of this)
So I baked the healight at 250 for about 5 minutes to melt the seal down
Next I grabbed some gloves and began to open the headlight, here is the healight opened
Here you have three parts to the healight, I removed the screws that held the chrome housing to the lens
Next I painted the chrome housing black (My preference)
After drying I layed down 3M double sided tape in the top opening
I also drilled a hole for the led strip wire as I did not want to block the city lights hole
Next I applied the led strip lights (I got mines off of ebay)
Like i said I did not take enough pics. But I put everything back togther. To melt the factory seal back down just place the back part of housing back into the oven for 5 mintues and reassemble.
Here is the finished product (I'll take some better pics tonight)
I will post how I wired them etc. later tonight. Any question just let me know and I will try and answer them to the best of my knowledge.
Overall I like it, and it looks really cool at night and during the day.
Last edited by triumphbeatz; Nov 21, 2011 at 08:23 AM.

 Nice finished look too!
Thread Starter
|
Junior Member
Joined: Jul 2011
Posts: 28
Thanks, my wife nearly killed me when she saw the car apart and the headlight in the oven LOL, just glad it turned out well


Senior Member
Joined: Aug 2010
Posts: 1,128
From: NJ/USA
Hey man not for nothing you can start a little side hustle by just buying a stock pair of OEM head lights for any Mitsubishi then converting it and doing trade offs with potential customers. They buy the same type you receive paypal then ship they ship you their headlights. Back on lancerevom forums we had a guy that used to do that. Happy Holidays to all! BTW start with Outlanders 
Thread Starter
|
Junior Member
Joined: Jul 2011
Posts: 28
Hey man not for nothing you can start a little side hustle by just buying a stock pair of OEM head lights for any Mitsubishi then converting it and doing trade offs with potential customers. They buy the same type you receive paypal then ship they ship you their headlights. Back on lancerevom forums we had a guy that used to do that. Happy Holidays to all! BTW start with Outlanders

Thread Starter
|
Junior Member
Joined: Jul 2011
Posts: 28
Ok, so here is the updated pics, I will take some more suring the day, I will also load some more pics of all the mods I did, I tried to take them this morning but it was just to dark. And in case anybody was wondering Yes, the lights are inside of the headlight thats why I was able to shape them instead of one straight line across the bottom like I have seen some folks do when Im driving LOL. I also utilized the space that I orginially had the strip light and replaced with a organge strip light and wired it to my blinker it looks really cool, I just have to figure out a way to take a pic, I think I will do a video and upload it to Youtube with all the mods I did
Last edited by triumphbeatz; Dec 29, 2011 at 07:03 AM.
Senior Member
Joined: Aug 2010
Posts: 1,128
From: NJ/USA
Ok, so here is the updated pics, I will take some more suring the day, I will also load some more pics of all the mods I did, I tried to take them this morning but it was just to dark. And in case anybody was wondering Yes, the lights are inside of the headlight thats why I was able to shape them instead of one straight line across the bottom like I have seen some folks do when Im driving LOL. I also utilized the space that I orginially had the strip light and replaced with a organge strip light and wired it to my blinker it looks really cool, I just have to figure out a way to take a pic, I think I will do a video and upload it to Youtube with all the mods I did
Now that is Beautiful Artwork
I need a pair for my 2008 Mitsubish Outlander XLS can we plz get LED/Angeleyes/and some Halo too sir
Thread Starter
|
Junior Member
Joined: Jul 2011
Posts: 28
Thanks Man, I was thinking about the halo, I seen some on ebay that I wanted to install, but I thought it would be a bit much with the led lights, led turning signal, and HID LOL