When you click on links to various merchants on this site and make a purchase, this can result in this site earning a commission. Affiliate programs and affiliations include, but are not limited to, the eBay Partner Network.
Mitsubishi Montero & Montero SportThis sport utility vehicle offers more size than the other Mitsubishi SUVs, but manages to keep a sporty look and comfortable feel, unlike many larger SUVs.
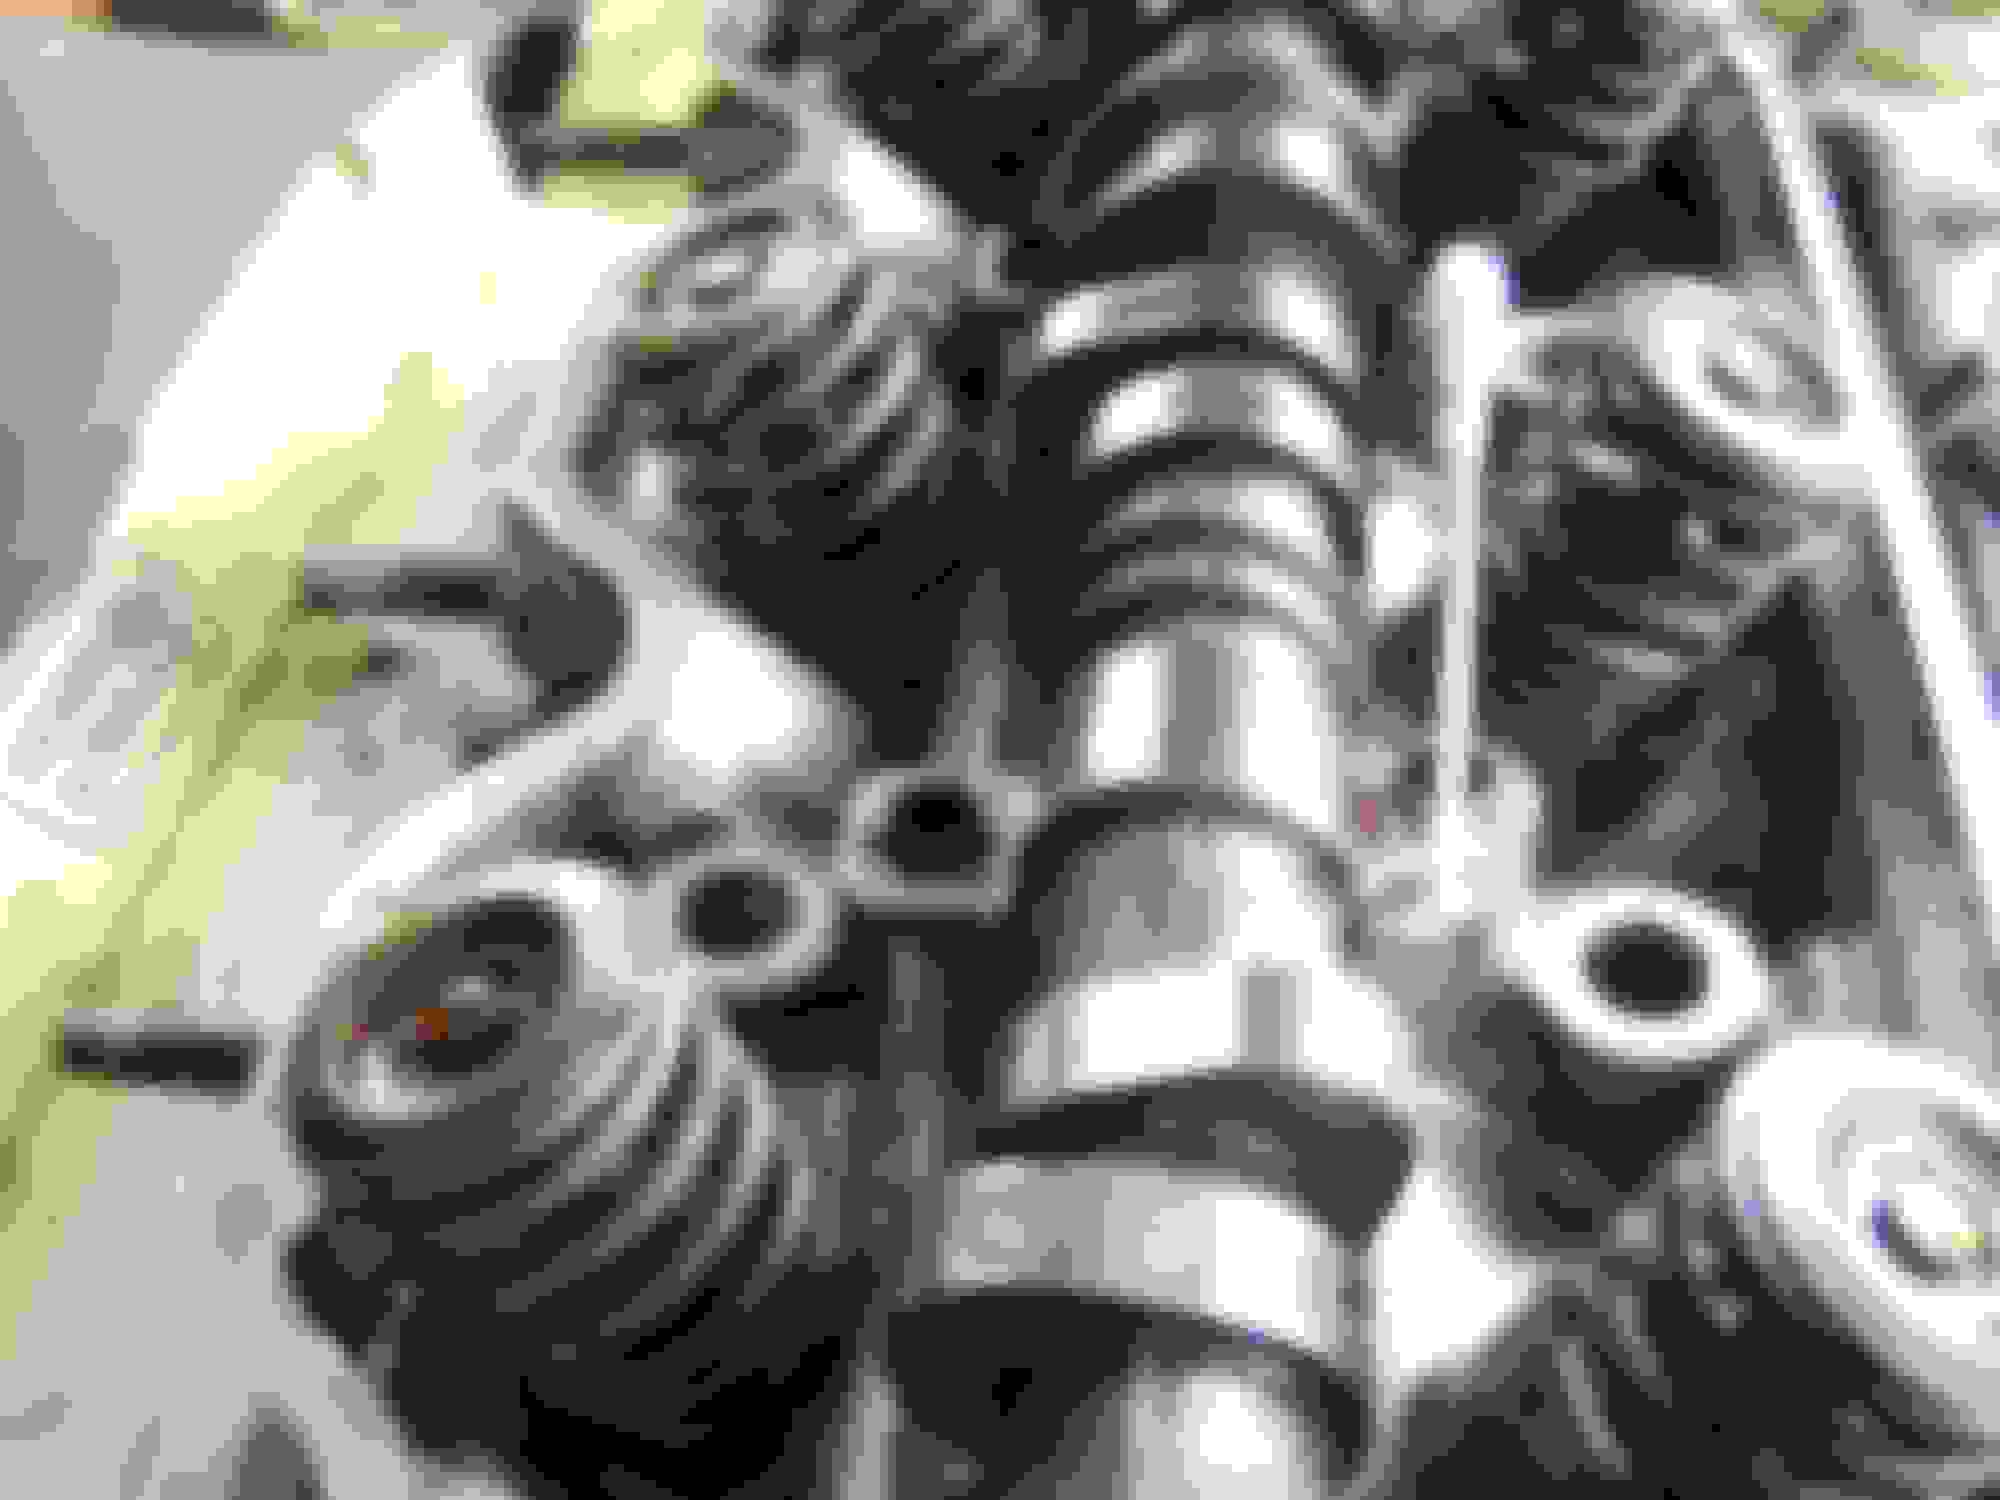
I decided to remove the cam shaft assembly to make it easier to replace the front and rear seals. Glad I did, as I found one lifter a bit damaged and needing replacing. I was also able to flush out the cam shaft oil feeder hole, and the entire cam shafts and inspect the small lifter oil holes to ensure they were open. Some pics:
I easily found the oil feeder hole (Qtip in upper part of pic), and the lower Qtip is the hole in the camshaft assembly where the oil feeds into.
Another pic of the only hole that supplies oil up to the camshaft/lifters:
I used a syringe and pumped old gas through the 2 holes (one hole is the oil feeder for the cam bearing) at a good amount of pressure, and it did a great job of flushing out the crapola:
I also found that by holding the cam assembly vertical, I could push downward on the rocker arms for better cleaning, and to expose the oil holes that feed the rockers/lifters for cleaning with gas/toothbrush.
Got her all cleaned out, and followed up with some special juice injected through those two holes:
The special sauce (Marvel Mystery Oil) gushed down the tubes and out every rocker arm.
Since these clean lifters tend to want to slide out of the rocker arms when you flip it upright to place back onto the head, I thought I had a brilliant idea using strong magnets:
But the magnets just added more weight as they were more attracted to the steel lifter as opposed to the cast iron rocker arms....so, the lifters still wanted to fall out, so that little experiment did not work......easier to just have 3 lifters on one side in place, and lower the cam assembly down on those valves, and then there is still plenty of room to put the other lifters in the other side.
Head done, and ready to go back on.....and this time I did not forget to put the black RTV sealant on the 4 corners where the oil seals are:
1 down and 1 to go.....will pull off the other head after putting this one back in place.
I was confused by where you were going to apply rtv sealant until I saw the photo near the end. Very different head design fron newer version of this engine. On 6G74 the heads are taller and entire seat for the camshaft seals are built directly into the head.
Funny......I guess most mechanics were forgetting to use RTV sealant on this old style, and thus they changed to the taller head were it is not needed.
Did you think my Syringe cleaning, the "Special Sauce", and the Tesla "electro-gravetics" was over-the-top, or on the verge of a mad scientist out of control? Ha ha.
Hey....one thing I forgot to mention: The lifters require that you use a real small allen key to push into the hole and "collapse" it to let some of the factory oil out....otherwise I learned that the lifter will remain "rigid" and not float as hydraulic lifters should, which could cause engine damage. I still soaked them in the Special Sauce, but made sure to "poke them with the allen key" before putting them into the rocker arms. This seems to be an easy mistake to make. Do you think that if this is not done, that the engine oil pressure after start-up will take care of the situation, and prevent the damage that some talk about?
Hunter......Thanks.....Yes, I got it this morning, but very similar to reading "War and Peace" by Tolstoy....great content, but very long. As soon as I have sufficient time, I will definitely reply. Following the unnecessary war in Ukraine, and it is terrible to see the damage on both sides.......and I still put the blame on the US and their meddling in the Ukraine politics and causing the overthrow of their president in 2014......as usual, the blood is on the hands of the dumbass Globalist New World Order freaks in Washington and their "Deepstate" handlers.
...one thing I forgot to mention: The lifters require that you use a real small allen key to push into the hole and "collapse" it to let some of the factory oil out....otherwise I learned that the lifter will remain "rigid" and not float as hydraulic lifters should, which could cause engine damage. I still soaked them in the Special Sauce, but made sure to "poke them with the allen key" before putting them into the rocker arms. This seems to be an easy mistake to make. Do you think that if this is not done, that the engine oil pressure after start-up will take care of the situation, and prevent the damage that some talk about?
The way I understood instructions for lifters - the alien wrench trick is for colapsing the lifter in order to start flushing fluid through it. However, when you are done flushing out crud, you should submerge lifter in clean fluid (kerosine) and pump it until all air bubbles are gone and it regains full rigidity. If lifter is not fully primed, you will get that nasty lifter knock and have a chance of engine damage.
Hunter......I was confused about the proper way to "prepare/pump-up/deflate/etc." the lifters before installing them. I watched a few good Youtube videos, and the best one shows the guy cleaning them in kerosene as you suggested. He would insert the allen key in the hole and "pump" the lifter while up-side-down, and that let the fluid out to assist in flushing. Then he would submerge into the kerosene, and "pump" it while in its upright positing, and this filled up the lifter with fresh fluid......would repeat this a couple times to get the old krud out.
Then, he would submerge them in a cup of good engine oil, and pump them up (in upright positions) to fill them with the fresh oil. After soaking awhile, he would then insert the allen key and squeeze the end to "deflate" or let some of the oil out so that it was not rigid when installing them into the lifter arm/cam assembly. He states that engines could be damanged if they are installed in the "rigid" position, especially on engines where the piston can slap against the valve if the valve over-extends.,
So, Im thinking that the "rigid/fully extended" lifters would be pushing the valves open TOO FAR, and could smack against the piston top upon start-up. By having the lifters 'de-flated" or not "rigid", the valves will not over-extend and cause damage. But its still confusing for me......as the engine is running, doesnt the oil pressure cause the lifters to "pump-up" (as Arnold Swartz. would say), and once they are pumped up and "rigid", wouldnt this extend the valve and potentially cause damage? How does each lifter know how much to "pump-up" as the engine is running? I still cant quite wrap my head around it.
Here is the youtube video if you want to see his lifter cleaning/re-oiling/ deflating method:
I found a very good video detailing exactly how to bleed the lifters and to be sure they are bled "down" some (probably about 1/8" is enough) before installing them. Otherwise, the lifters are too long and push the valves way down too far into the cylinder.....engine wont start, or could cause damage. Here is the video:
I have a question regarding installing the distributor shaft gear back on after removing it:
I removed the second head (drivers side). After removing the cam sprocket, I needed to access the front seal, so the distributor had to come off. Now, I am wondering how do I know where to rotate the distrib. shaft gear so it lines up correctly with the gear teeth on the camshaft? Any tricks to getting the teeth lined up correct?
You are 100% correct - when engine is running, lifters are pressurized and are stuf as dickens...that stiffness is what allows the camshaft to transfer its movement/energy to the valves. The only thing i see is that having slightly deflated lifters may help with rocker arm assembly installation. You are not "fighting" against compressing valve springs as you are tightening up all the bolts. There is a very specific order in which you need to tighten those bolts. That allows gradual spring compression all around as you go. I suppose, if you're not paying attention, you could cross thread something during that procedure. When I replaced my valve seals, i reinstalled everything with stiff lifters.
As far as aligning camshaft, think of it as a timing puzzle. Turn crankshaft to to #1 cylinder at TDC, then turn camshaft(s) to roughly proper timing marks and install the heads.
As far as distributor - no clue. Mine is electronic spark control. Do you think it might help to put on the heads, then deal with distributor?
Hunter......So, it sounds like you are saying that it is "ok" to deflate or depressurize the lifters before installing them, and that upon start-up, the engine oil pressure will "pump them up" to the required amount. If so, I will keep them de-flated when installing. I still cant figure out how this process knows exactly home much to "pump up" the lifters, or how does it compensate at higher RPMs when oil pressure is higher. Still scratching my head on all that.
However, I forgot to mention another important tip from that video.....I need to test each lifter and ensure that it will actually "pump-up" or stiffen-up.......if not, the lifter is defective and must be replaced.
Camshaft bolts....Yep, I got the tightening order and torque limit from my shop manual (I think they are only 14 ft/lbs).
Alligning camshaft...Yep, I had it set at TDC before I removed the heads, and had the camshaft sprockets set on their proper timing marks so that should be no problem.
Alligning distributor....I found one video that showed a 93 Mitsubishi Mighty Max, and that distributor acutally had a mark beside the distr. shaft gear to show where it should be when inserting it.....but not sure if this 94 Montero has anything like that. Gonna dig thru the shop manual tonight and see if I find any info. on it. Maybe you are right, and I can slide the distrib. in after the head is put back in place.
 03-03-2022, 05:48 PM