
2012 Mitsubishi Outlander CVT Paddle Shifter Install


Thread Starter
|
Junior Member
Joined: Jun 2014
Posts: 7
From: Sydney, NSW, Australia
So I decided I'll make a how to on the paddle shifter install I did. This is my first practical write up so if I miss anything let me know.
Tools / Materials
- 2 x M6 WT8.8 25mm High Tensile Bolts
- 2 x Self Tapping 10G 3/4 Inch Screws
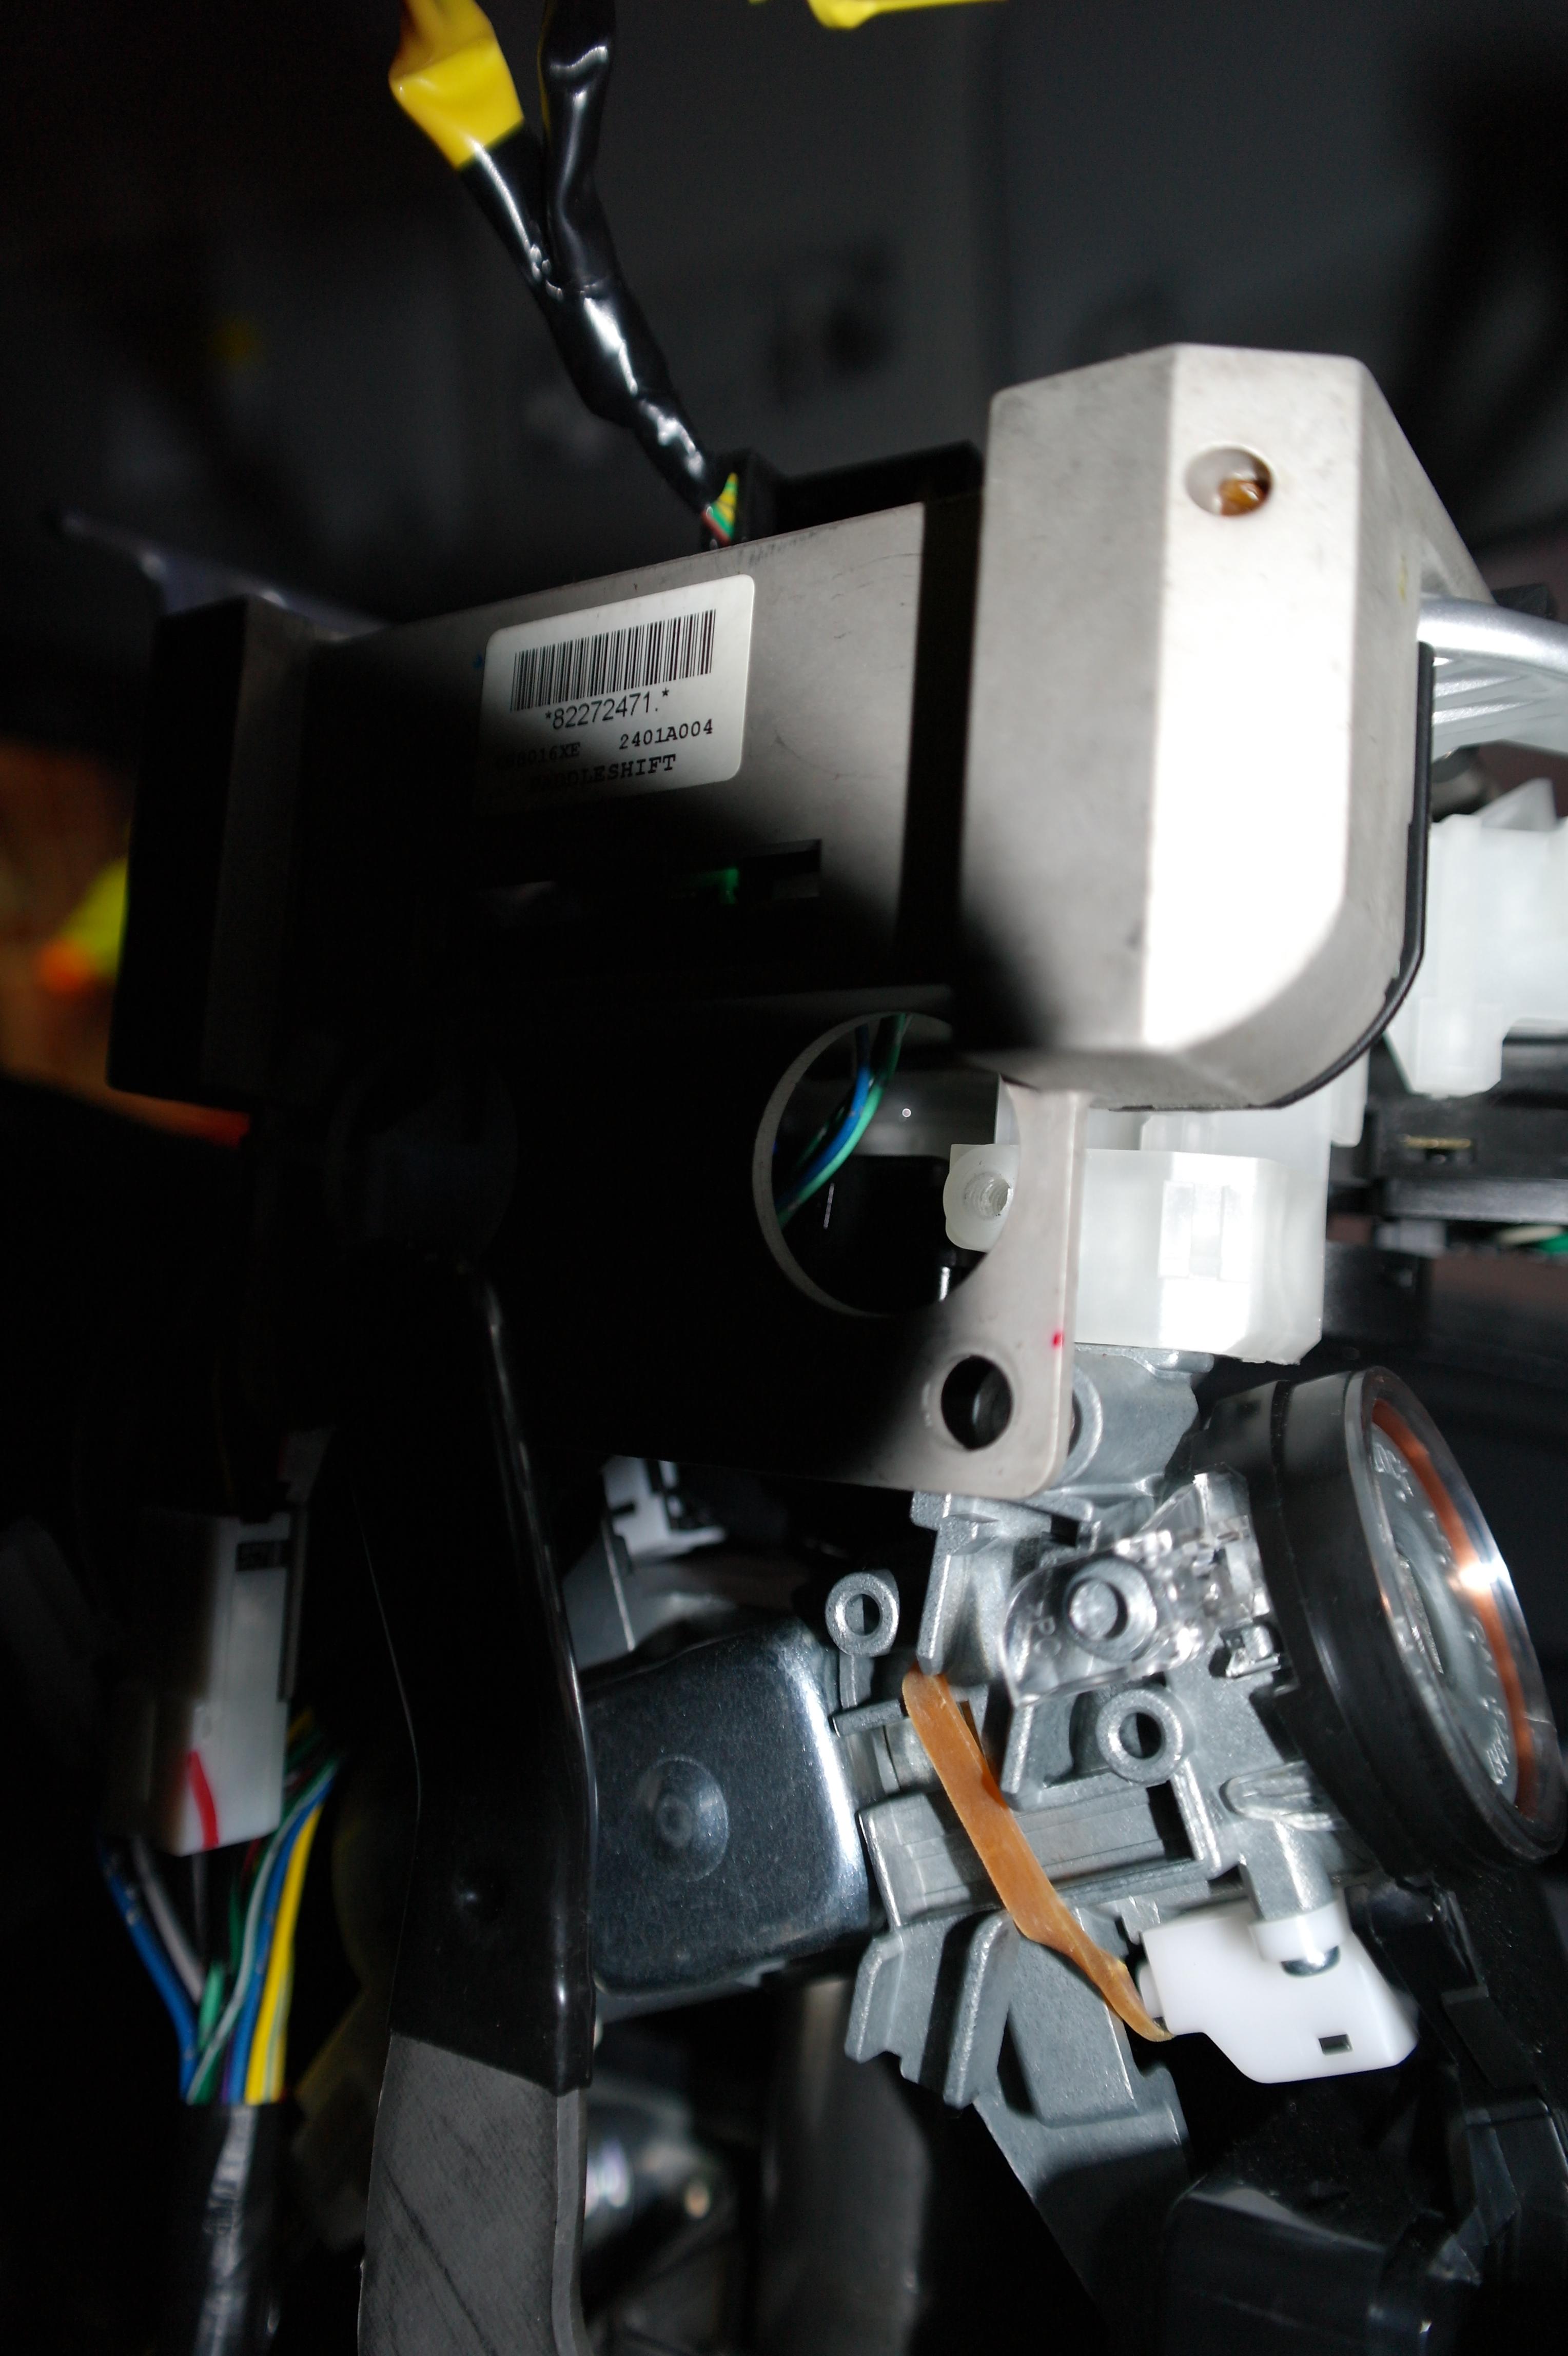
- Paddle Shifter Assembly (Lancer, Outlander, ASX/RVR/Outlander Sport, Evo
X) (MI-2401A004 SWITCH ASSY-A/T SHIFT RANGE)
- Bottom Steering Column Cover (Same models as shifter assembly, though must have slits for the shifters) (MI-8065A039XA COVER-STRING COLUMN-LWR(BLACK))
- T30 Bit
- 17mm Socket
- Flat Screwdriver (for pooping off trims)
- Philips Screwdriver
Method
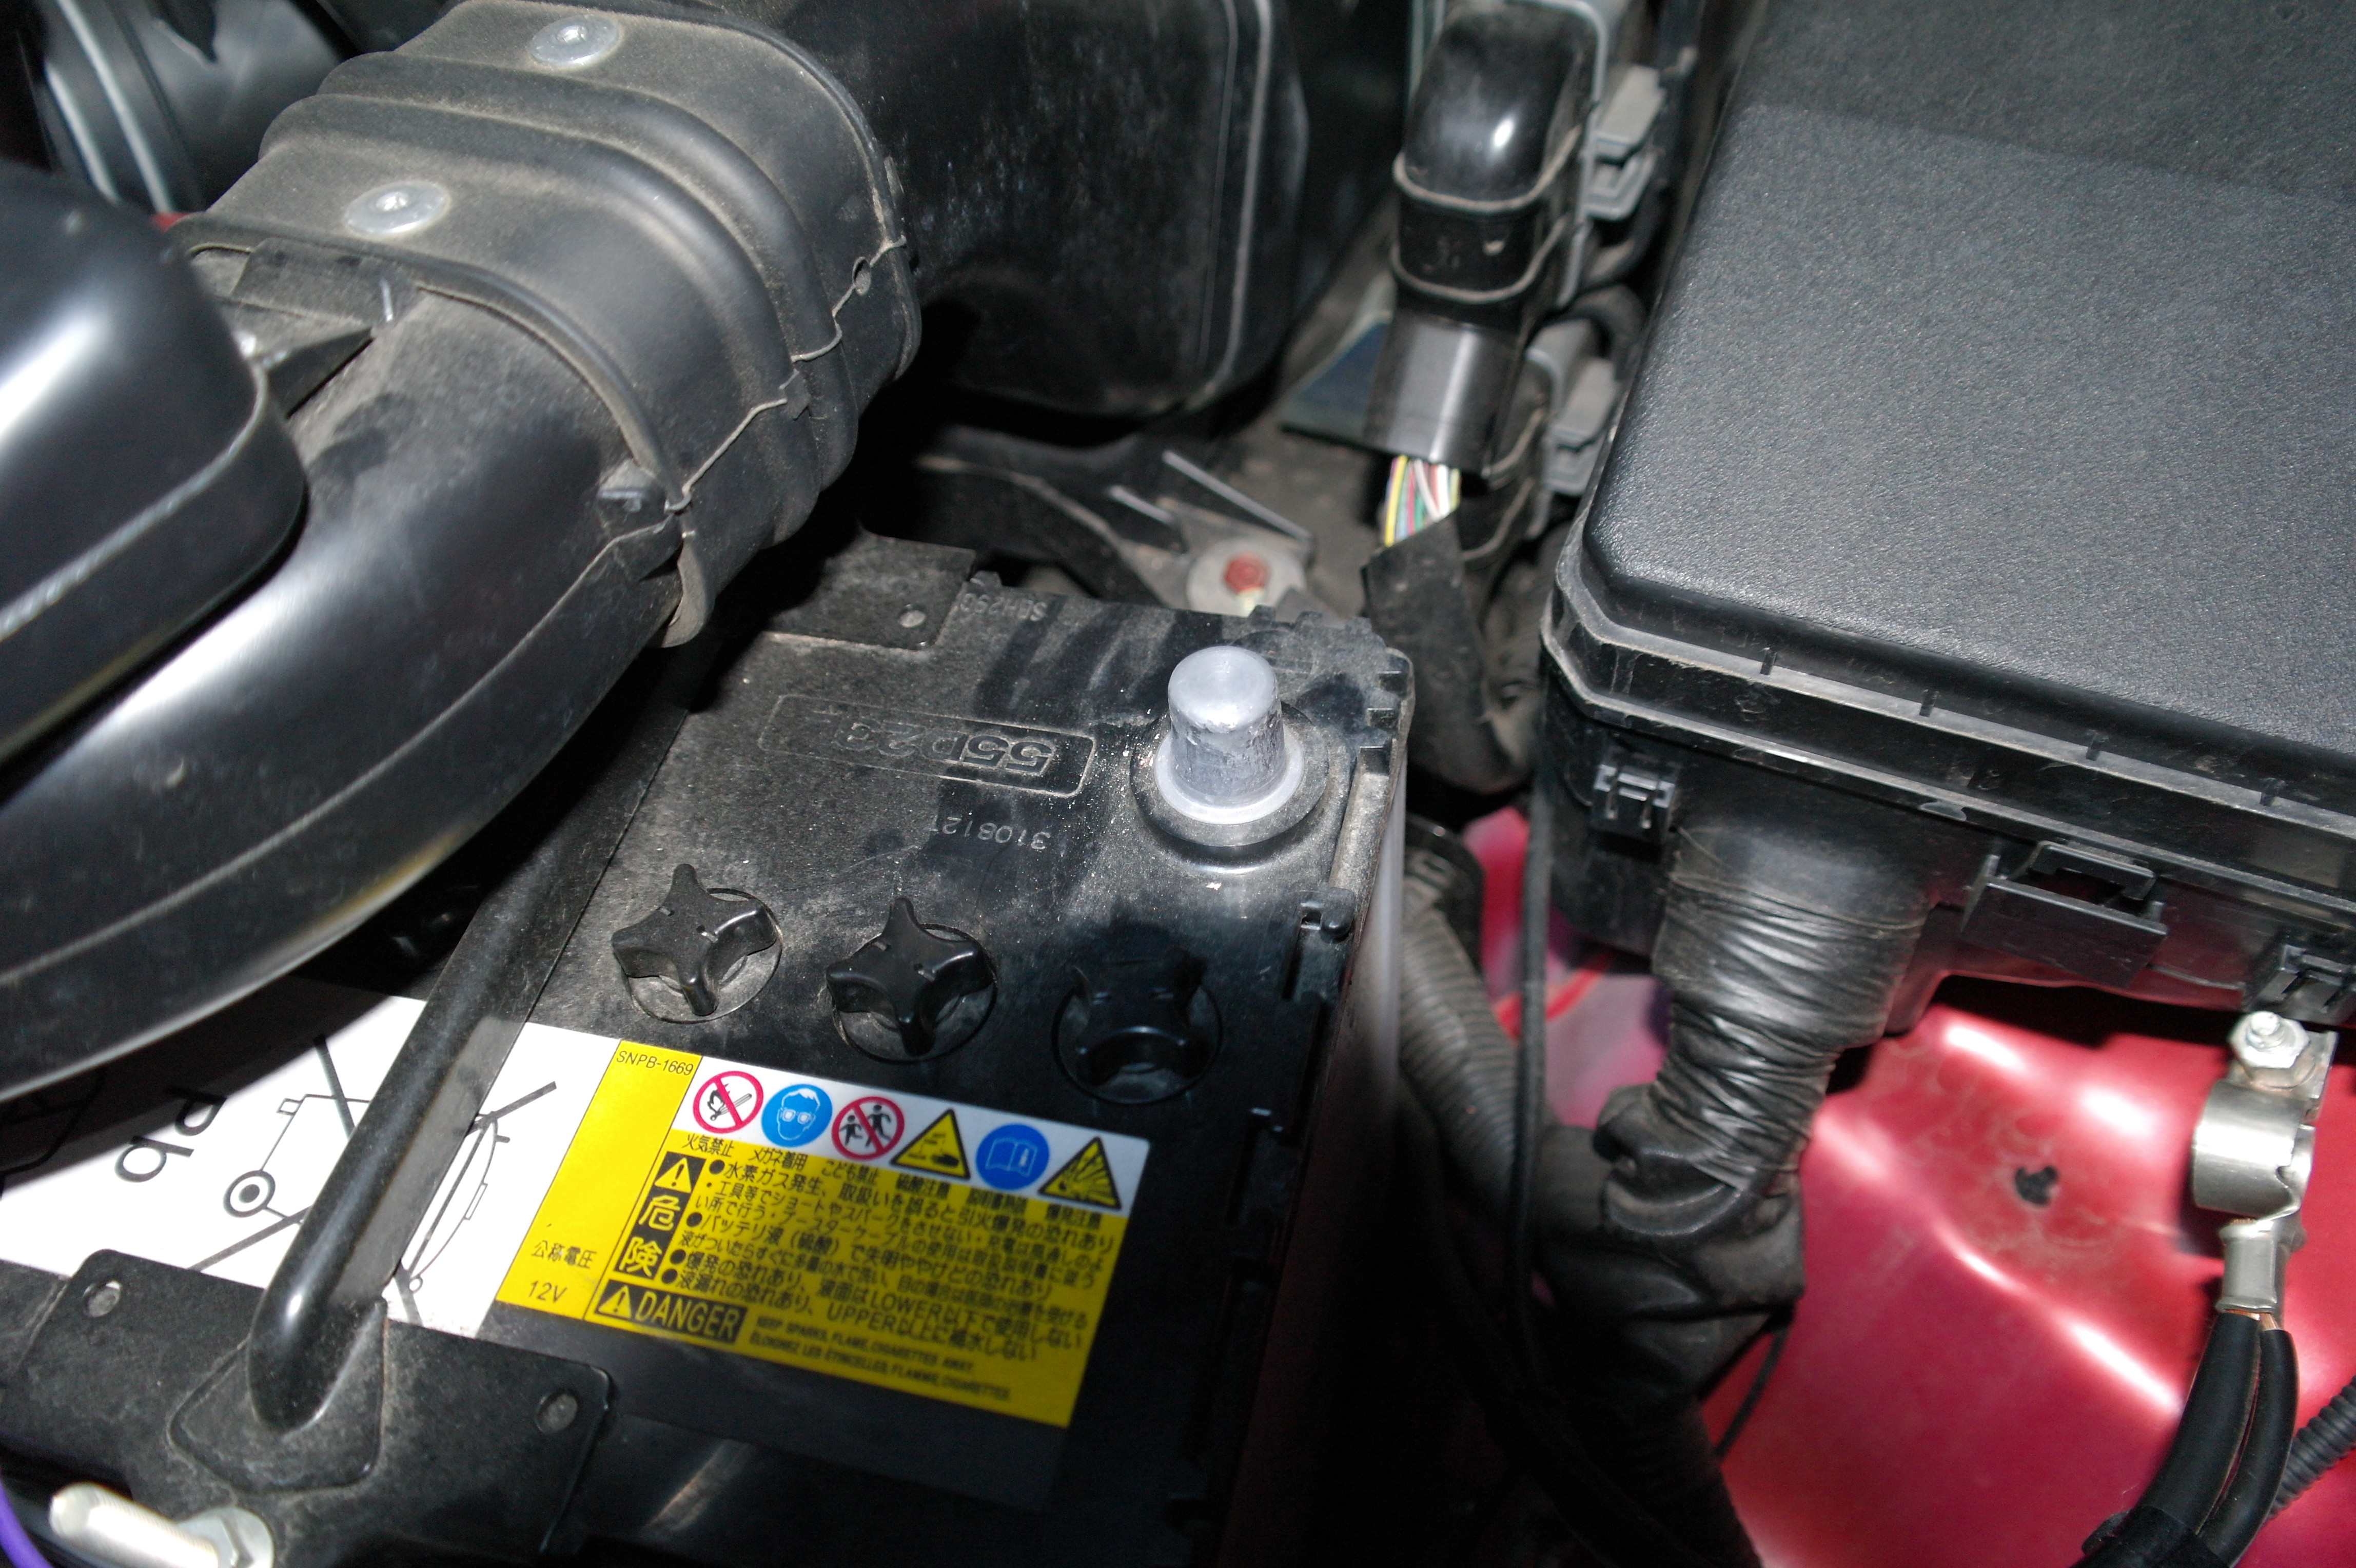
1. Make sure your wheels are straight. Remove the Negative Terminal from the battery.
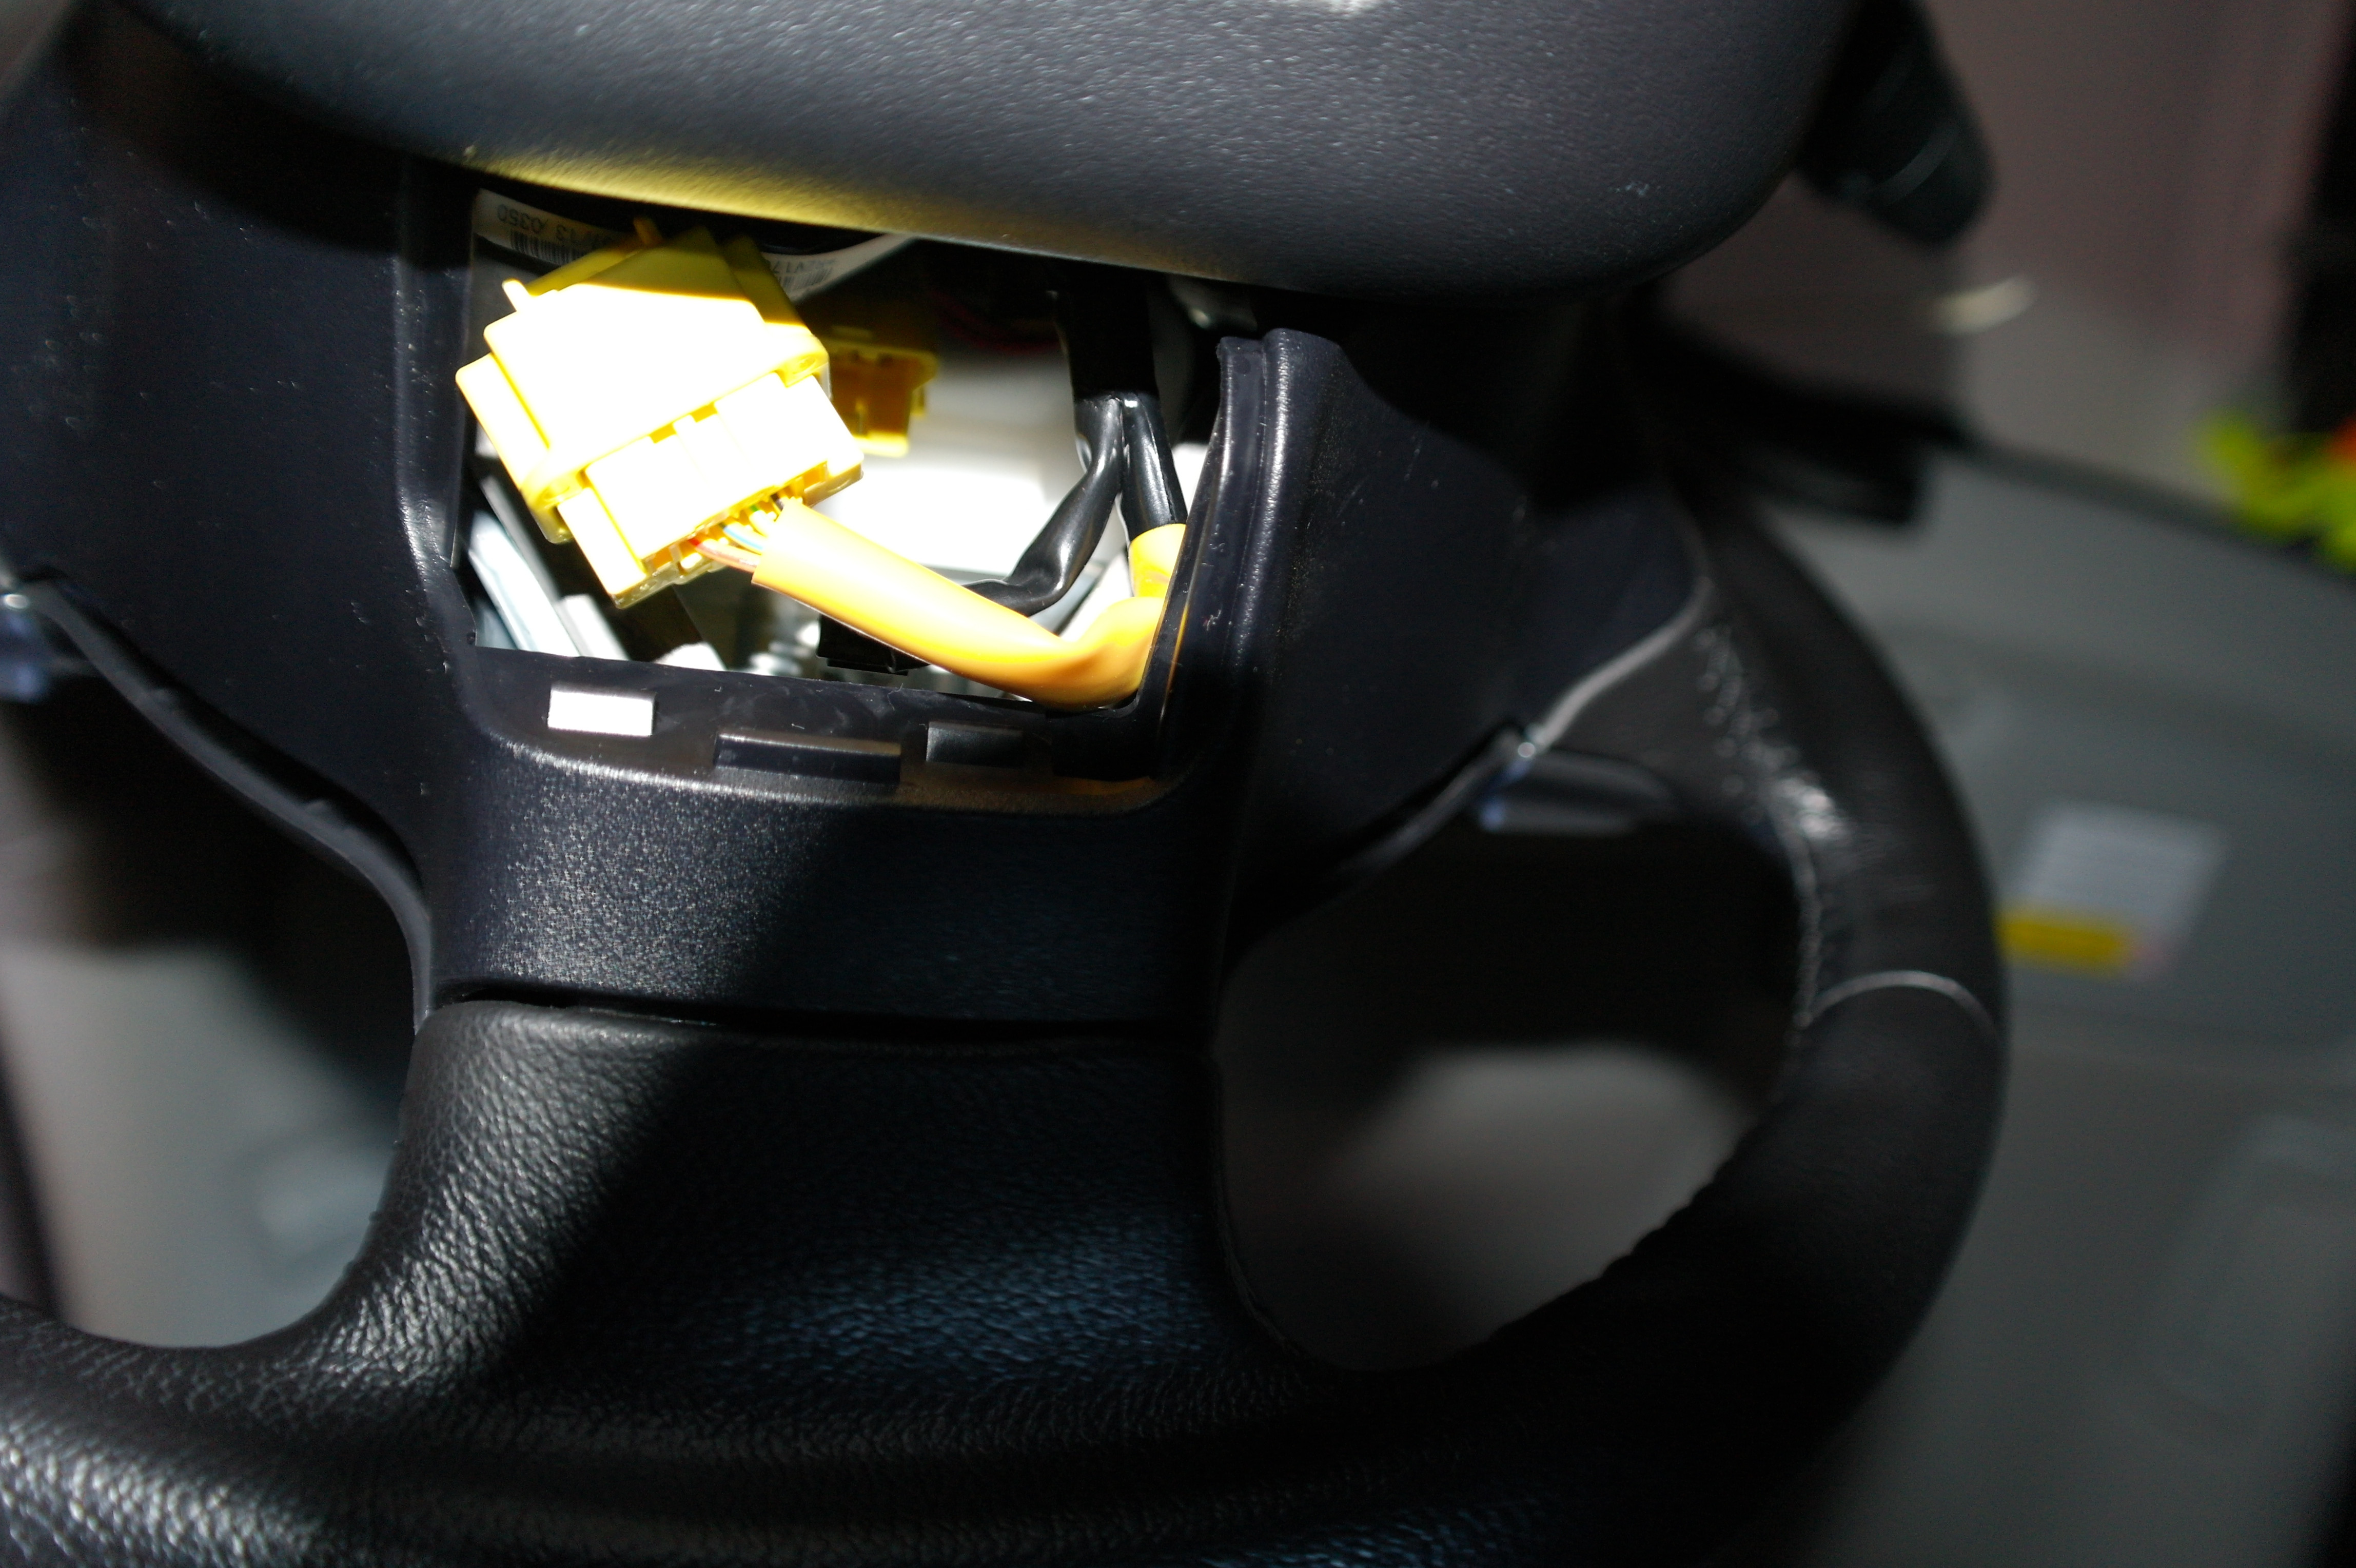
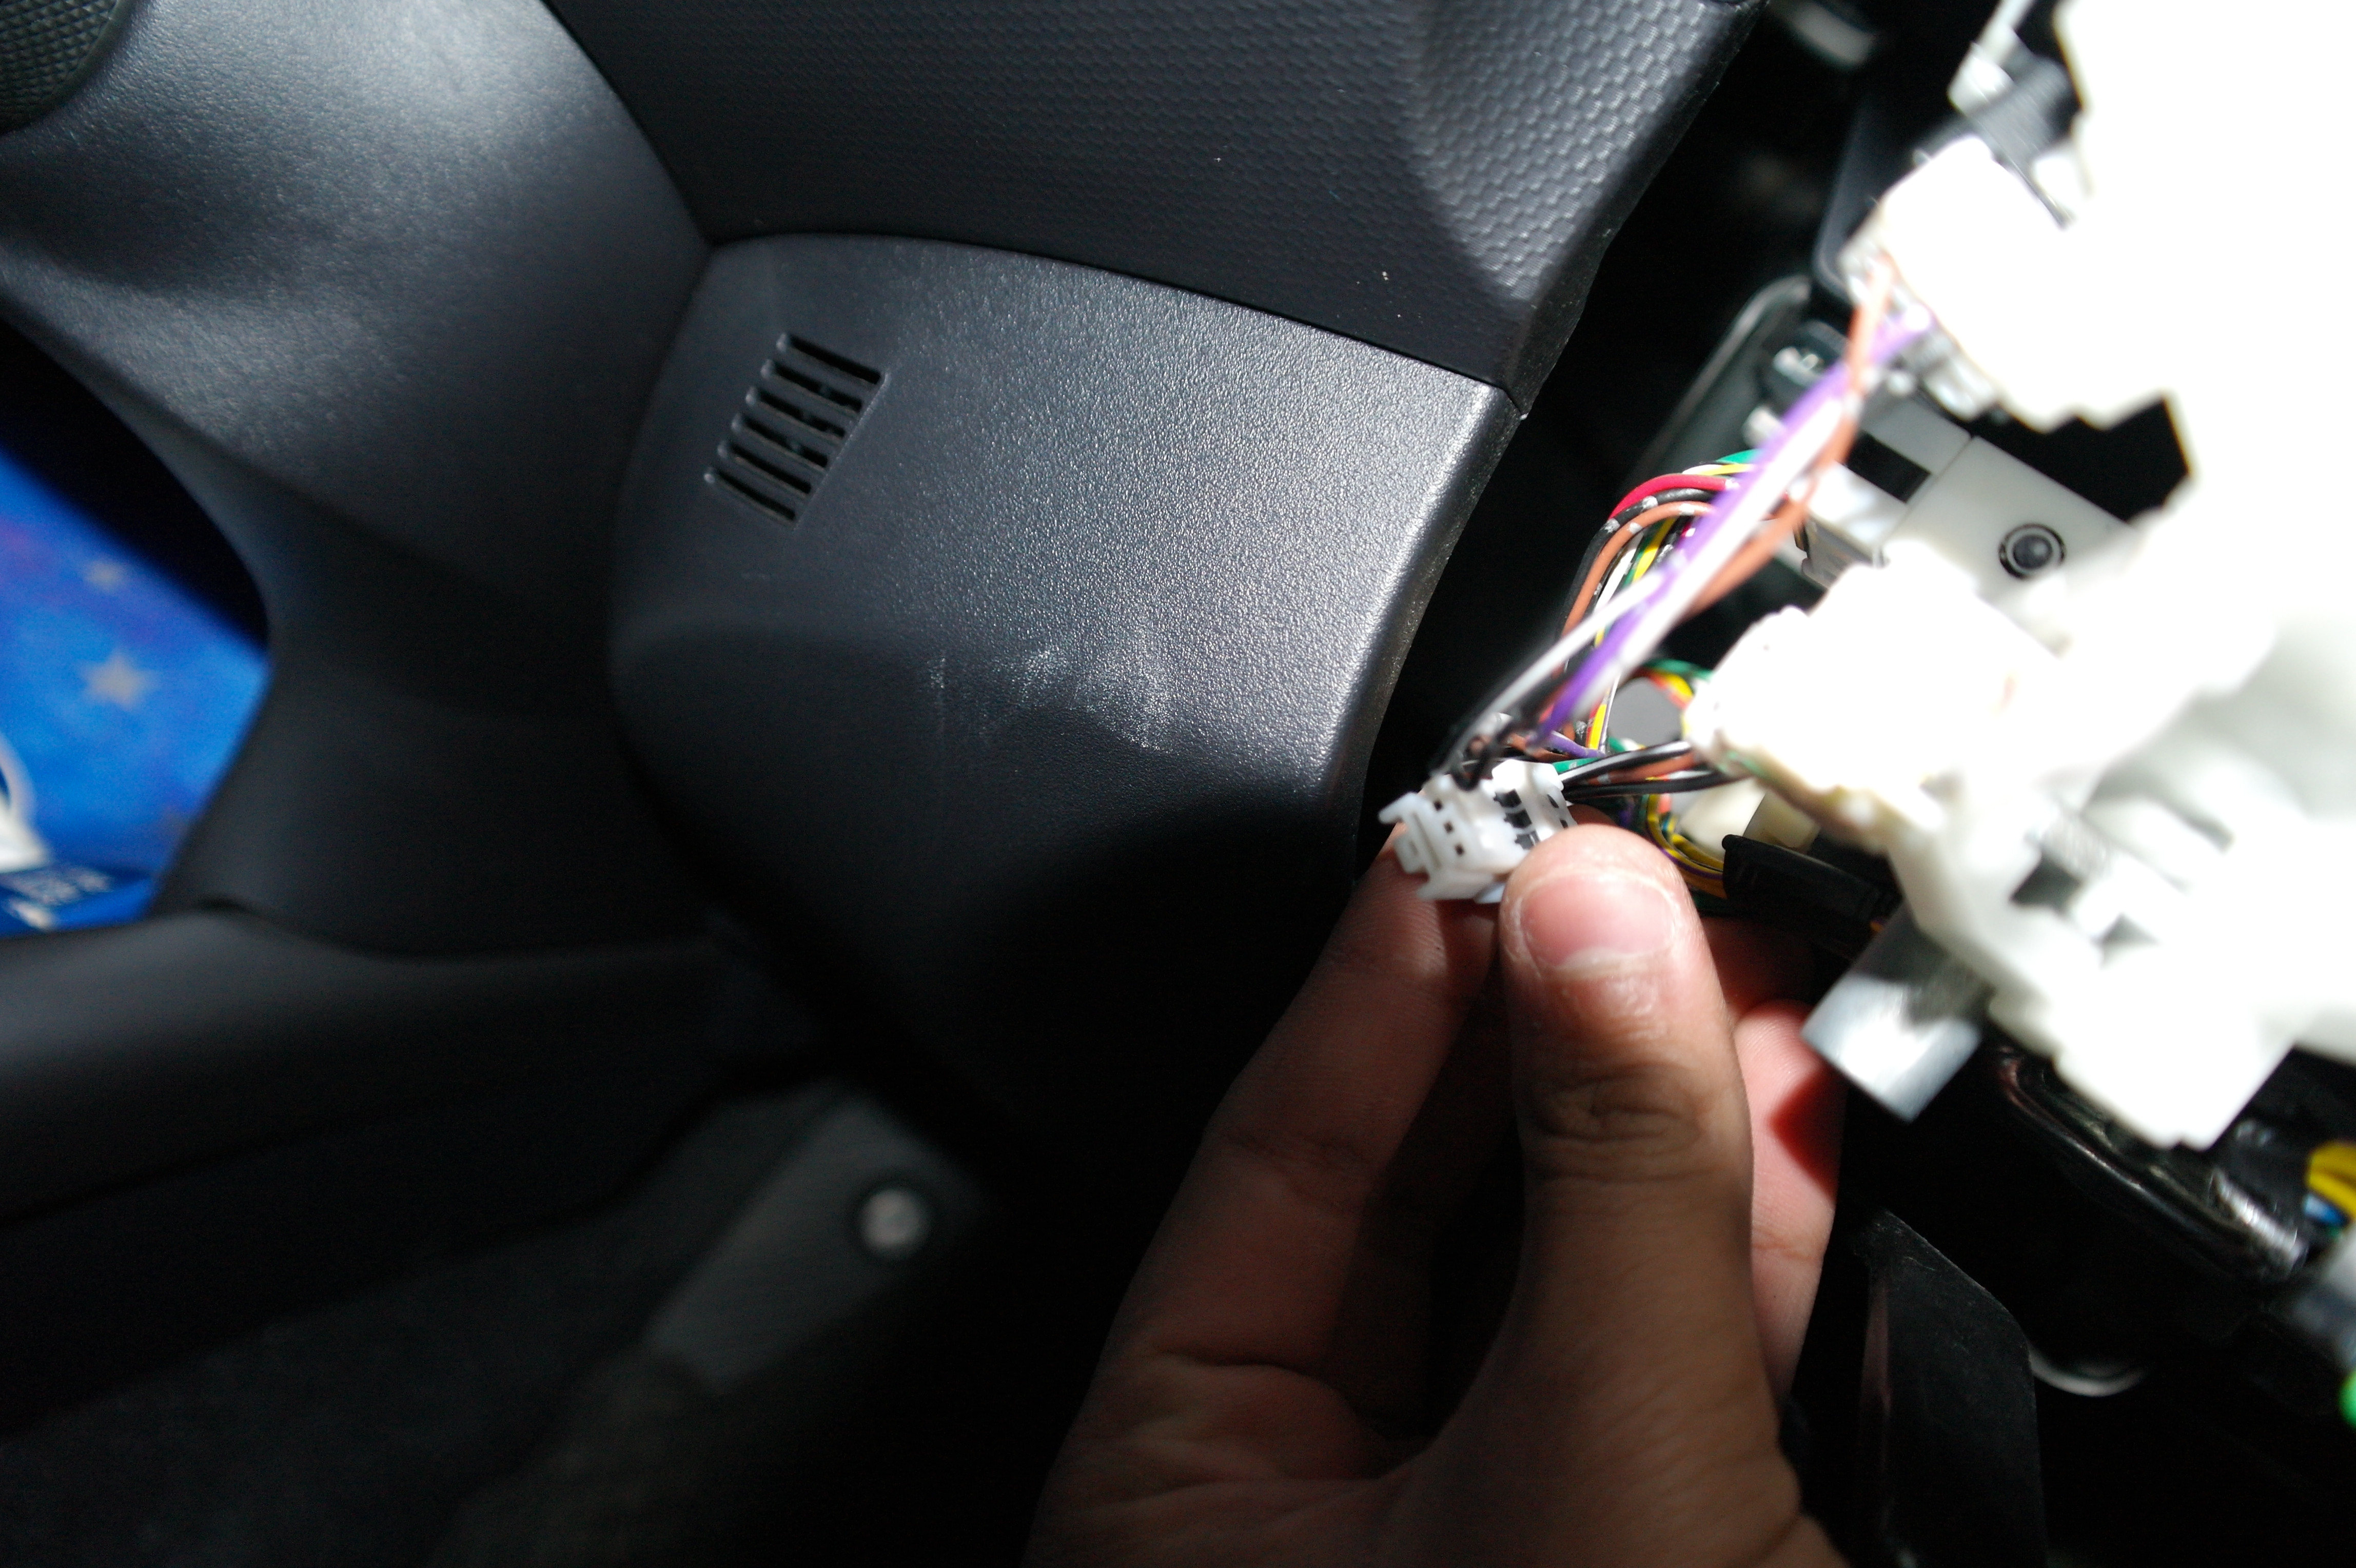
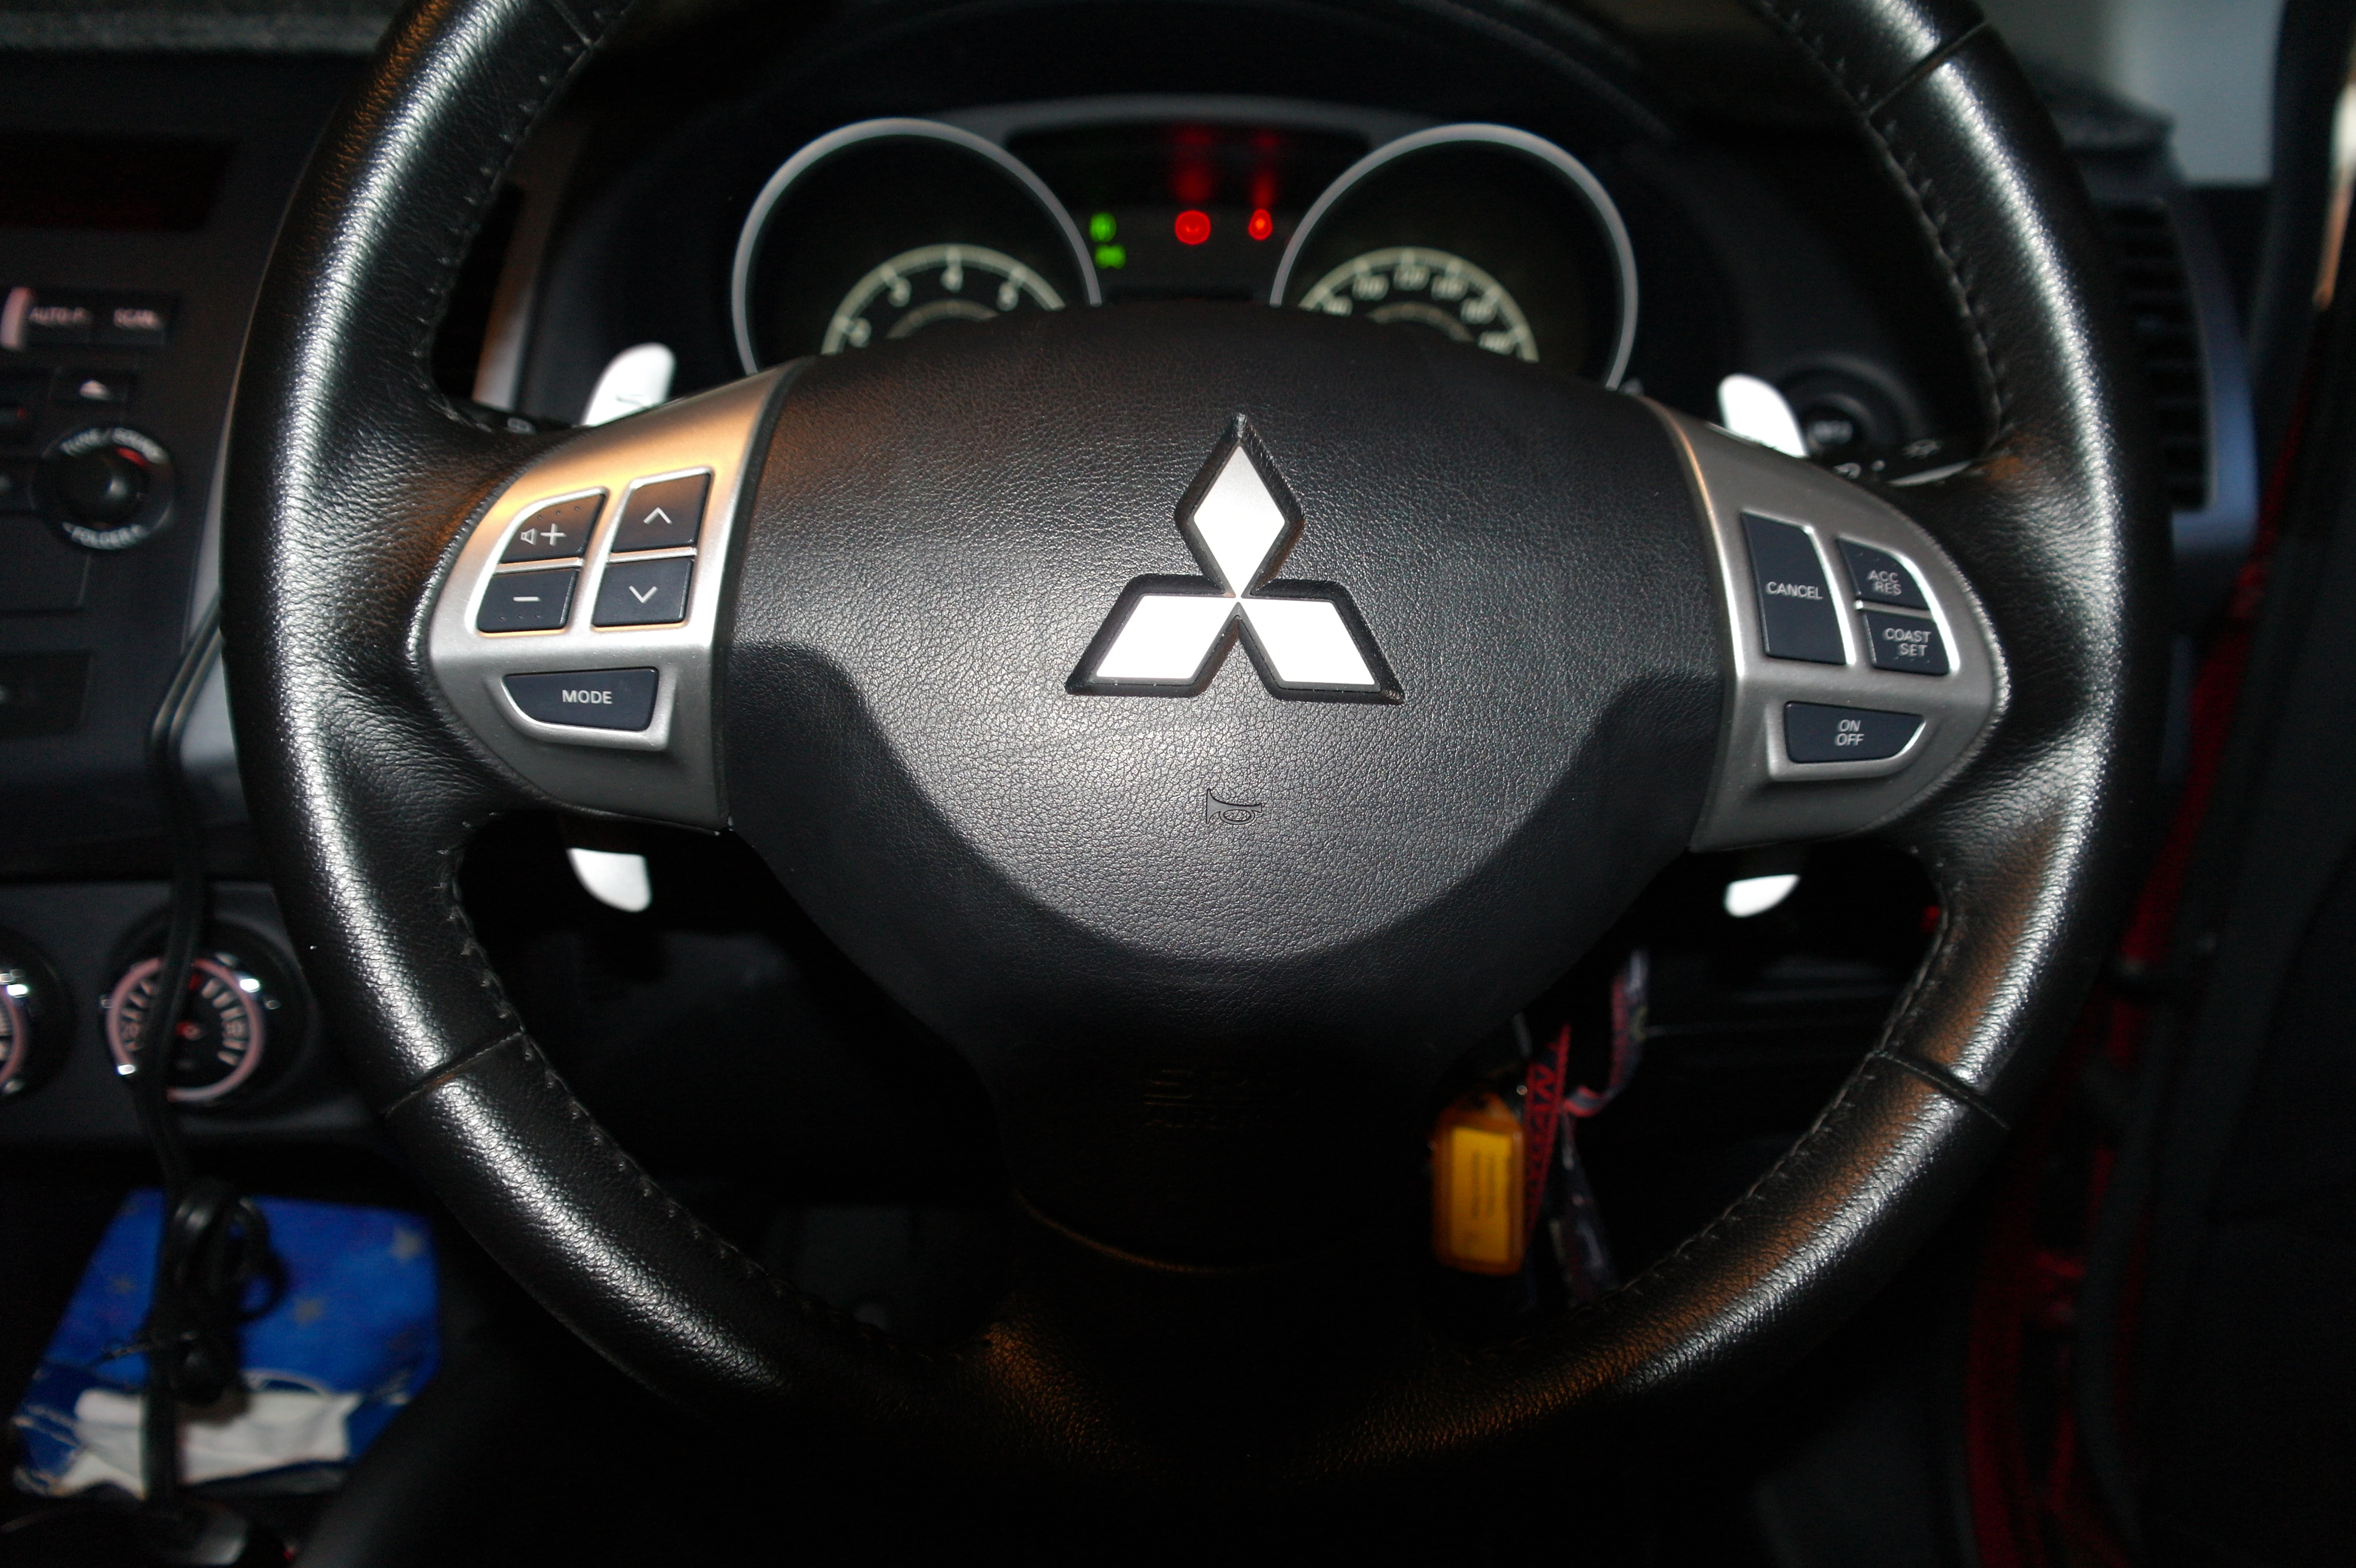
2. Remove cover from bottom of the steering wheel and disconnect the airbag plug (Yellow) It has a cover style sliding mechanism. It is pull the top back and then pull it out. (People with larger hands may struggle, but with some patients you will get it)
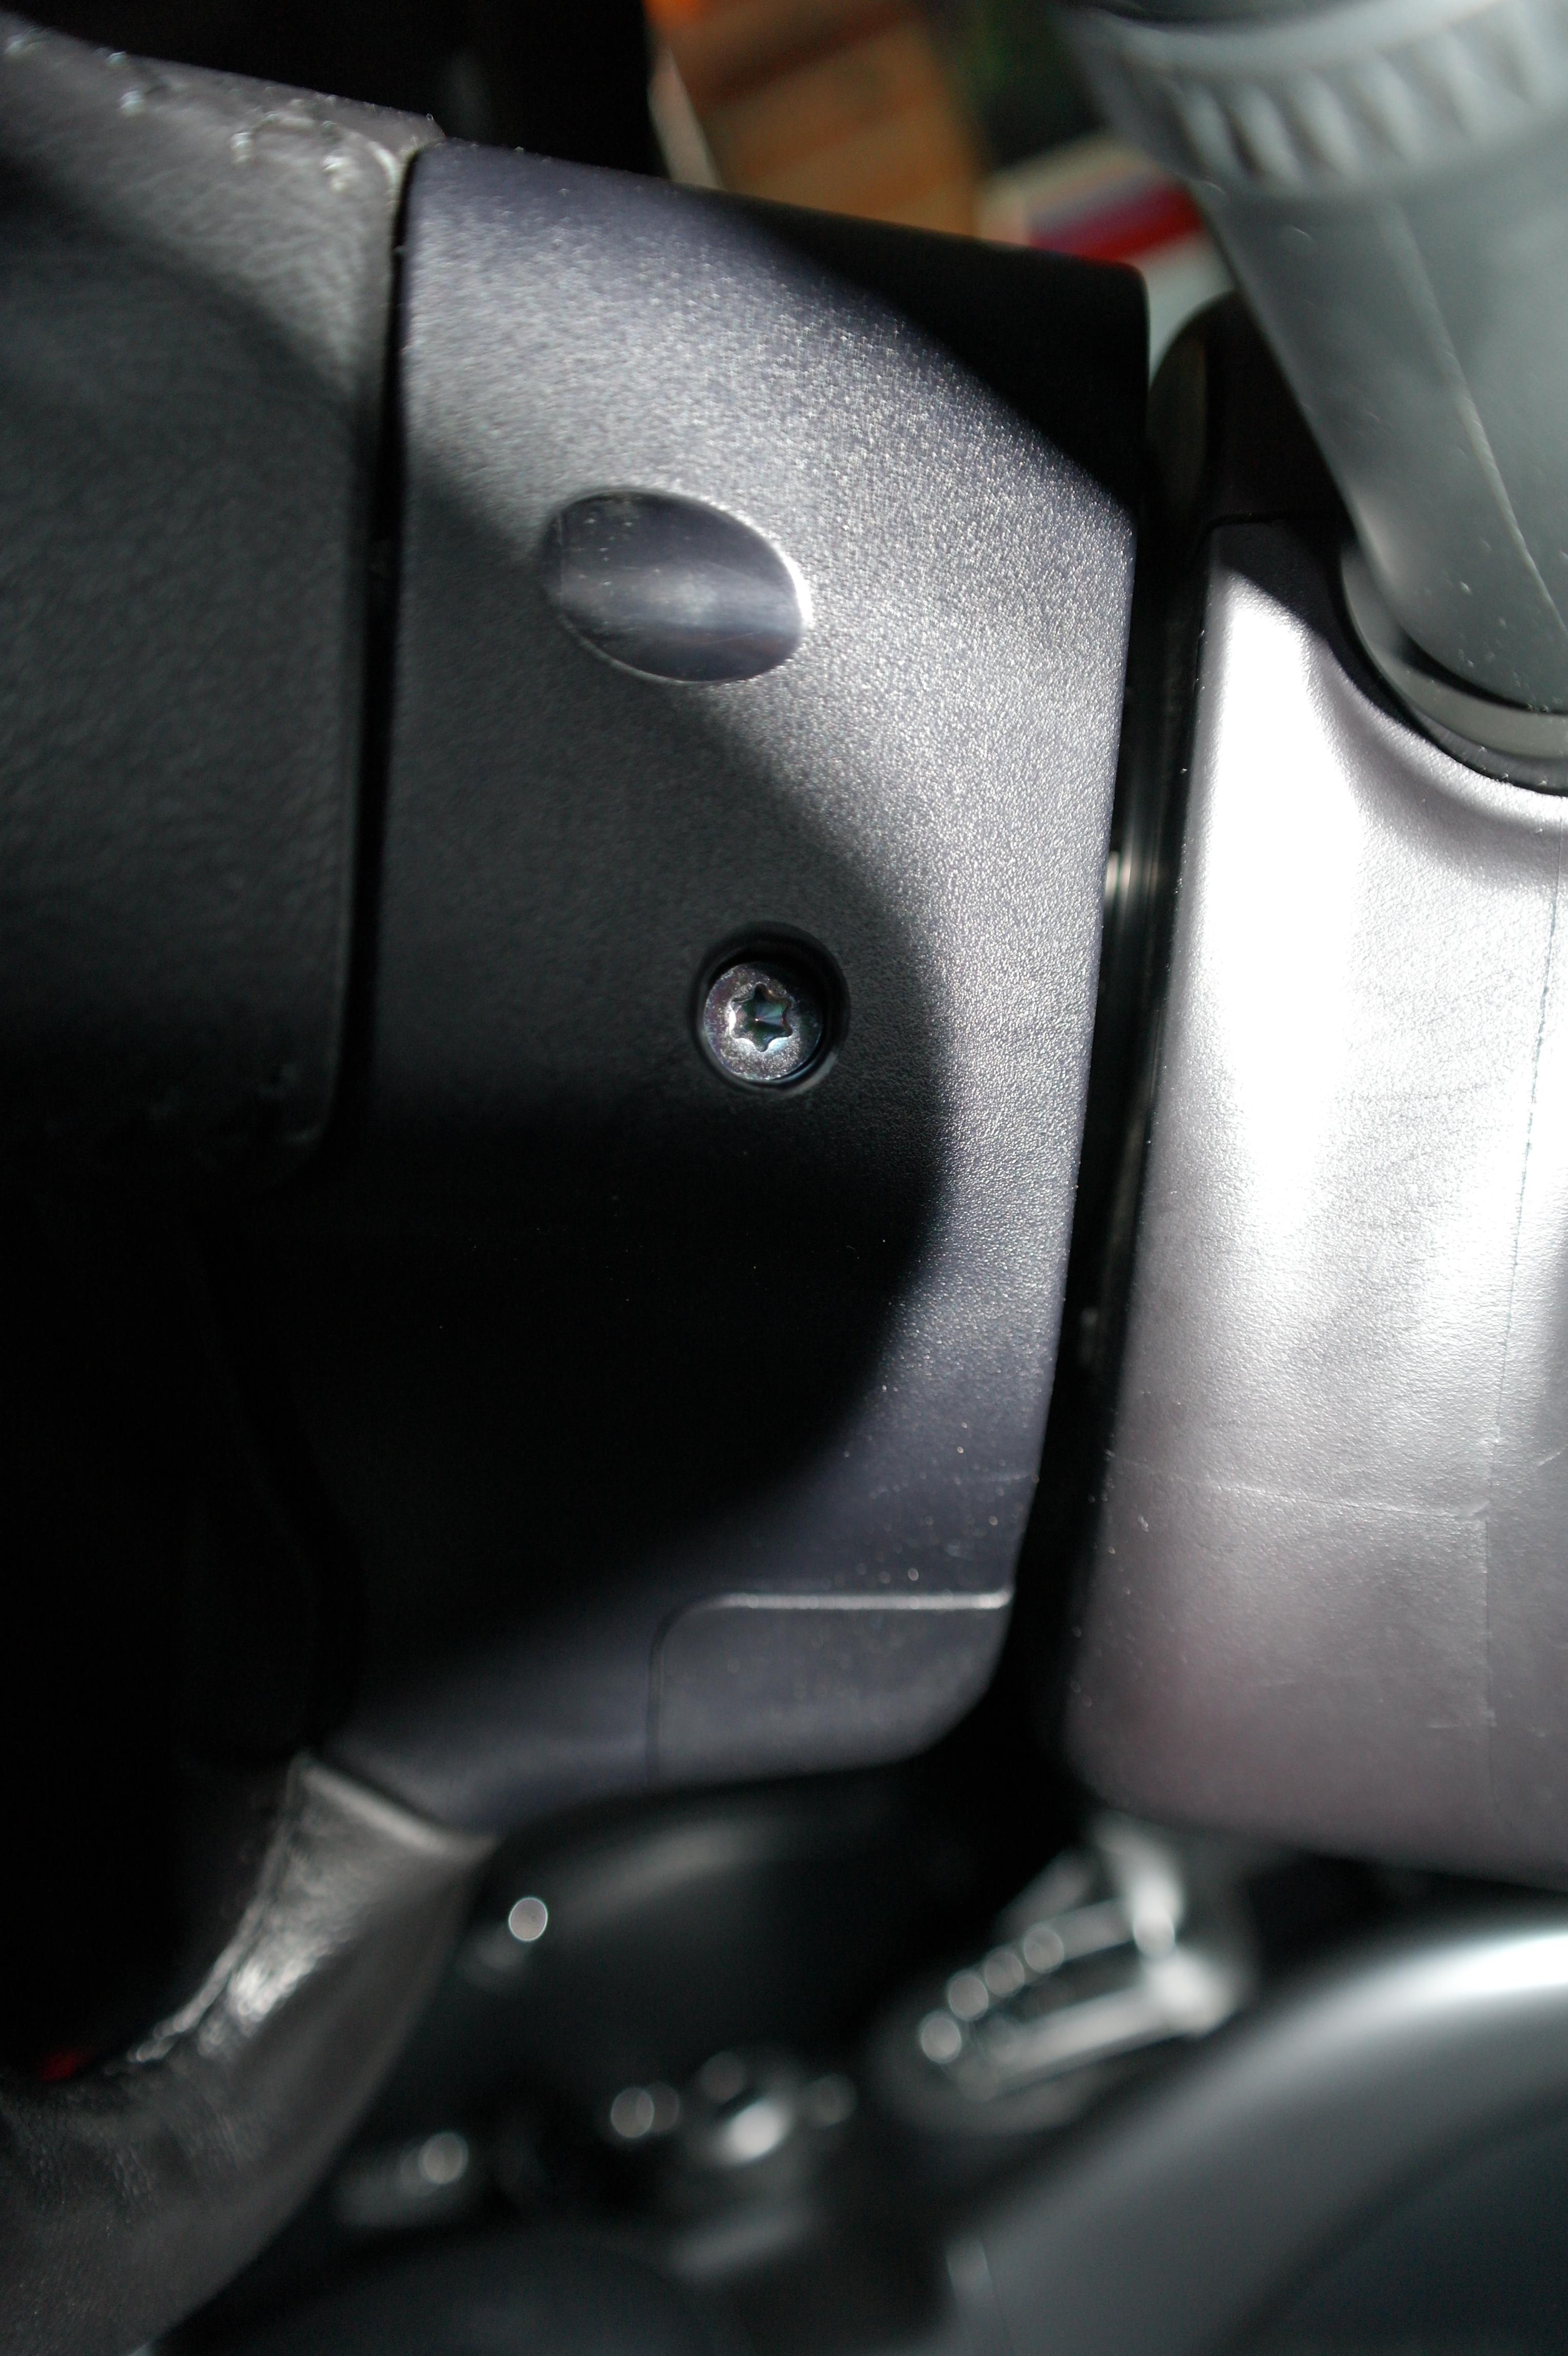
3. Unscrew the T30 Torx screws, the air bag cover or horn should be lose once it is fully undone, do not remove it from the hole as it is very time consuming to get it back in and does not need to be removed completely.
4. The airbag will now be moveable. Pull it out and then remove the small black plug from the back of the airbag.
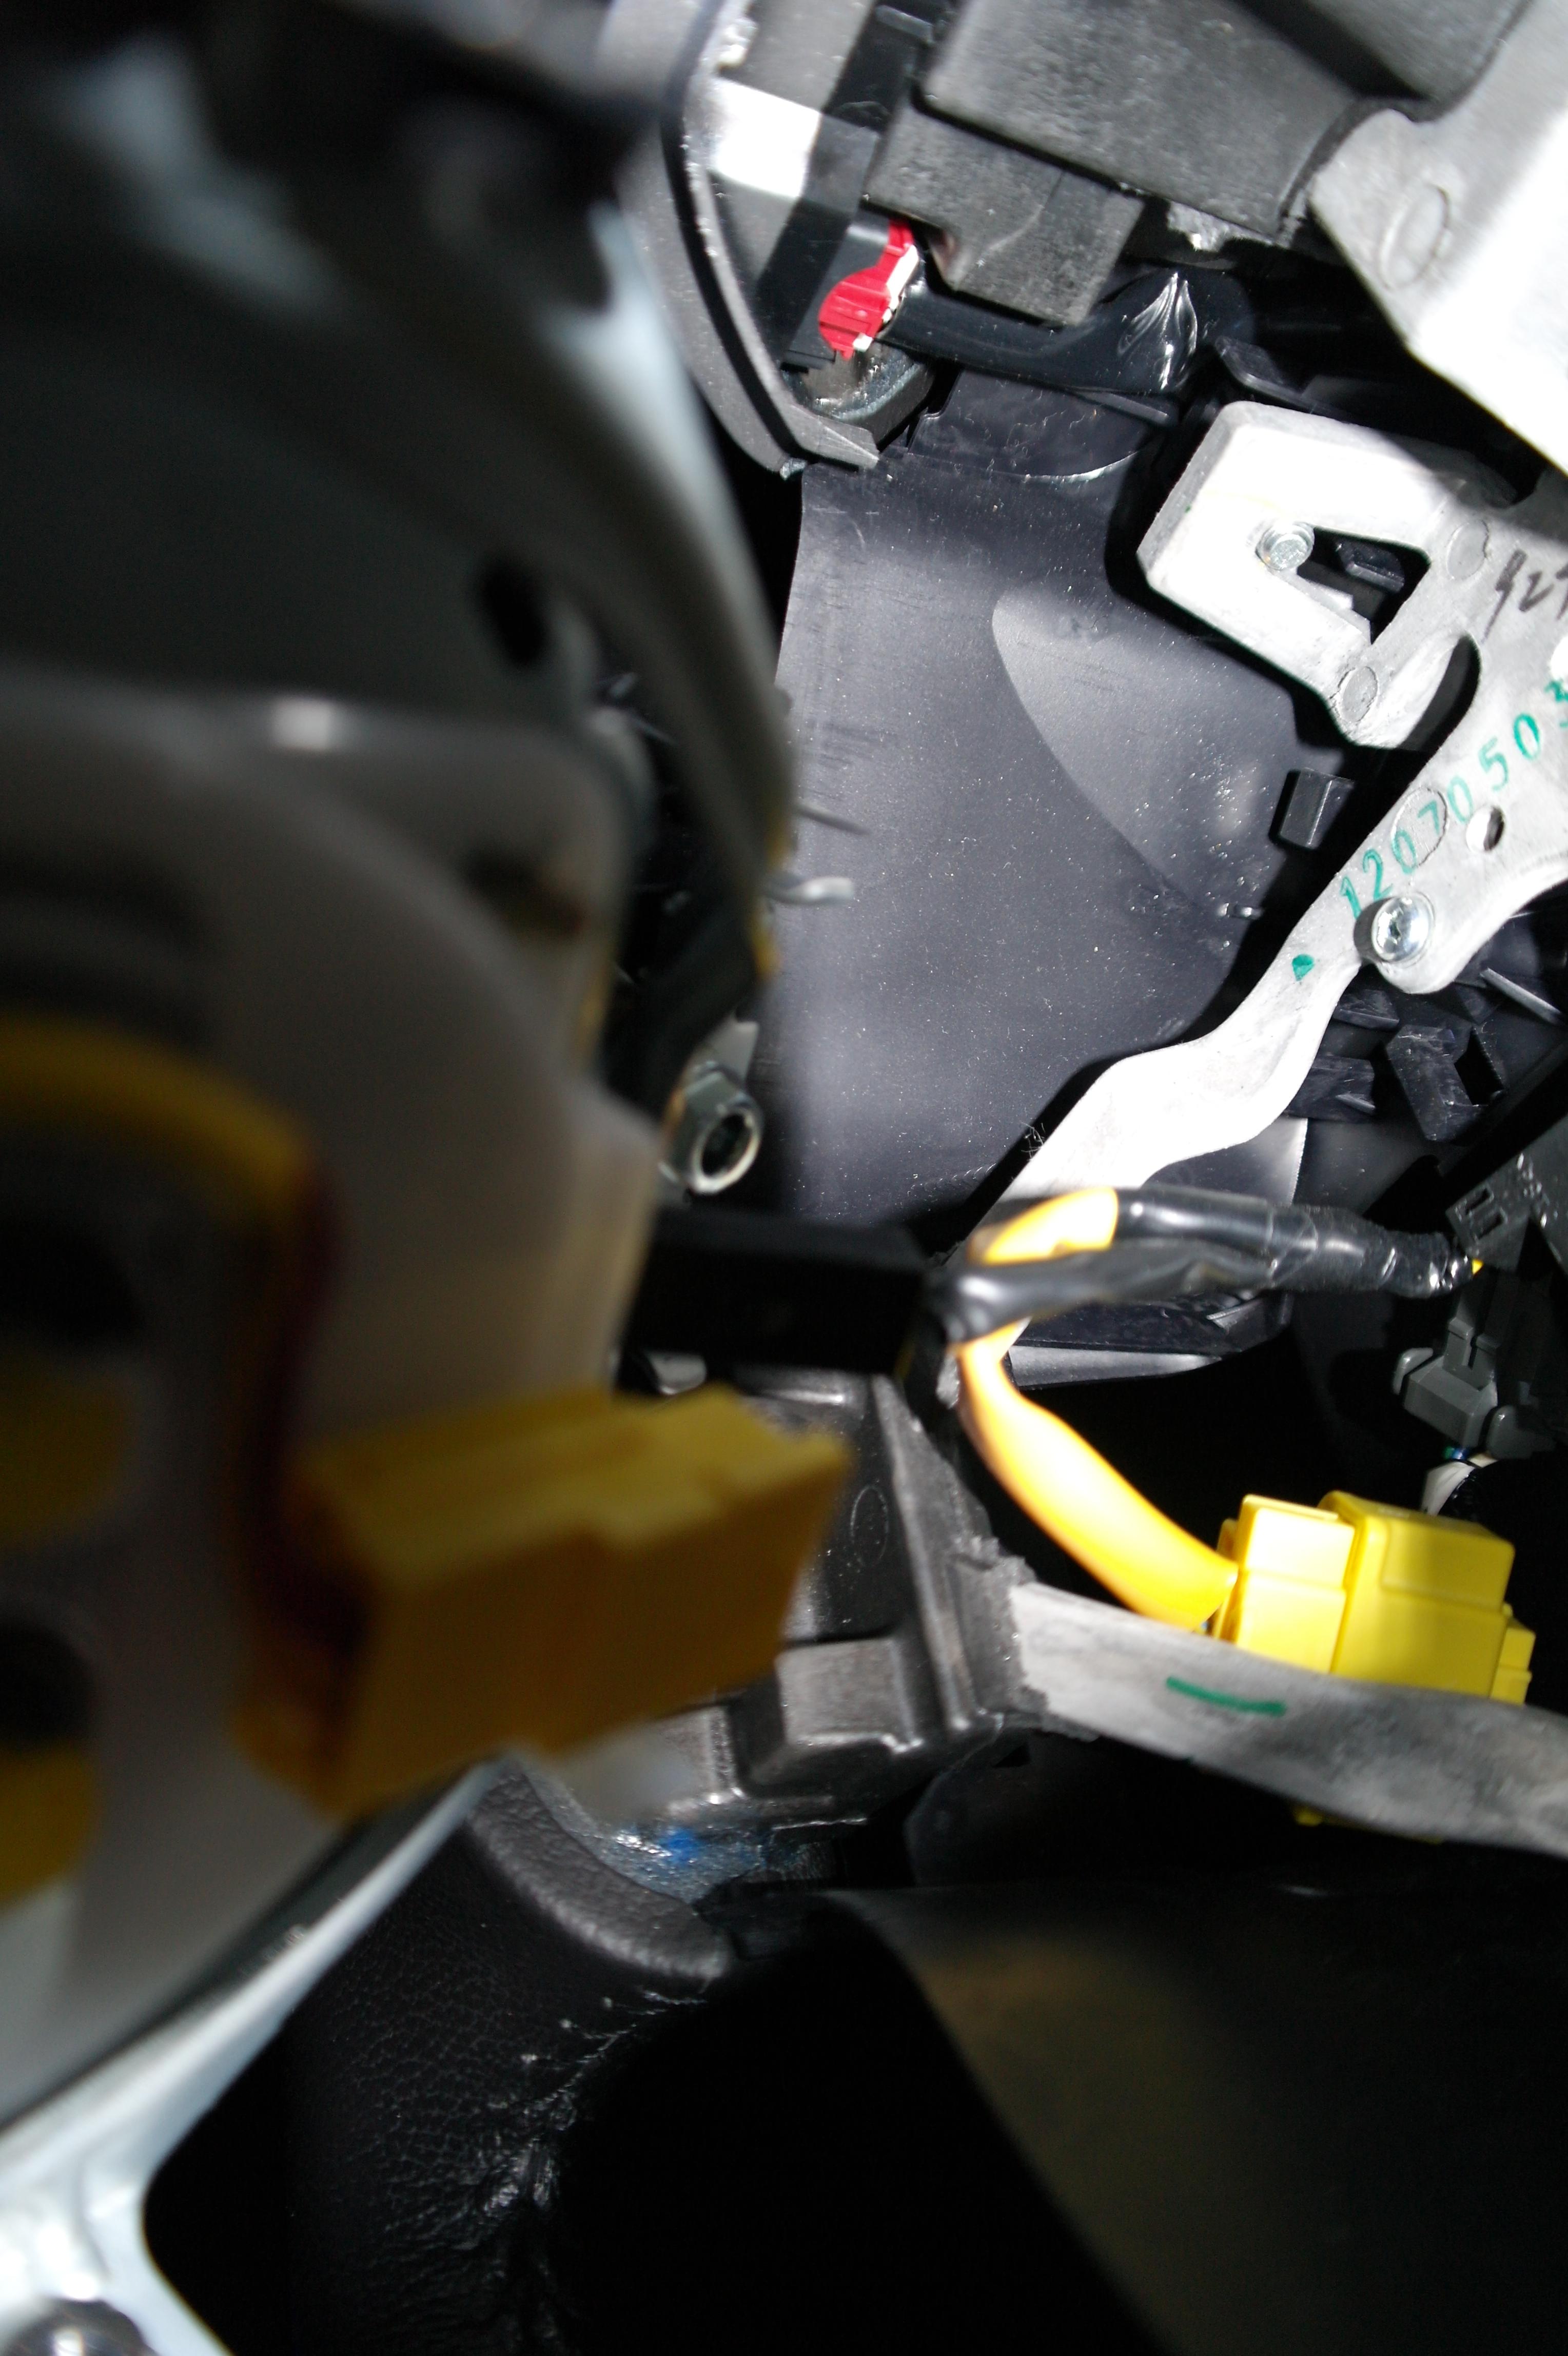
5. Remove the grey plug from the bottom of the clock spring.
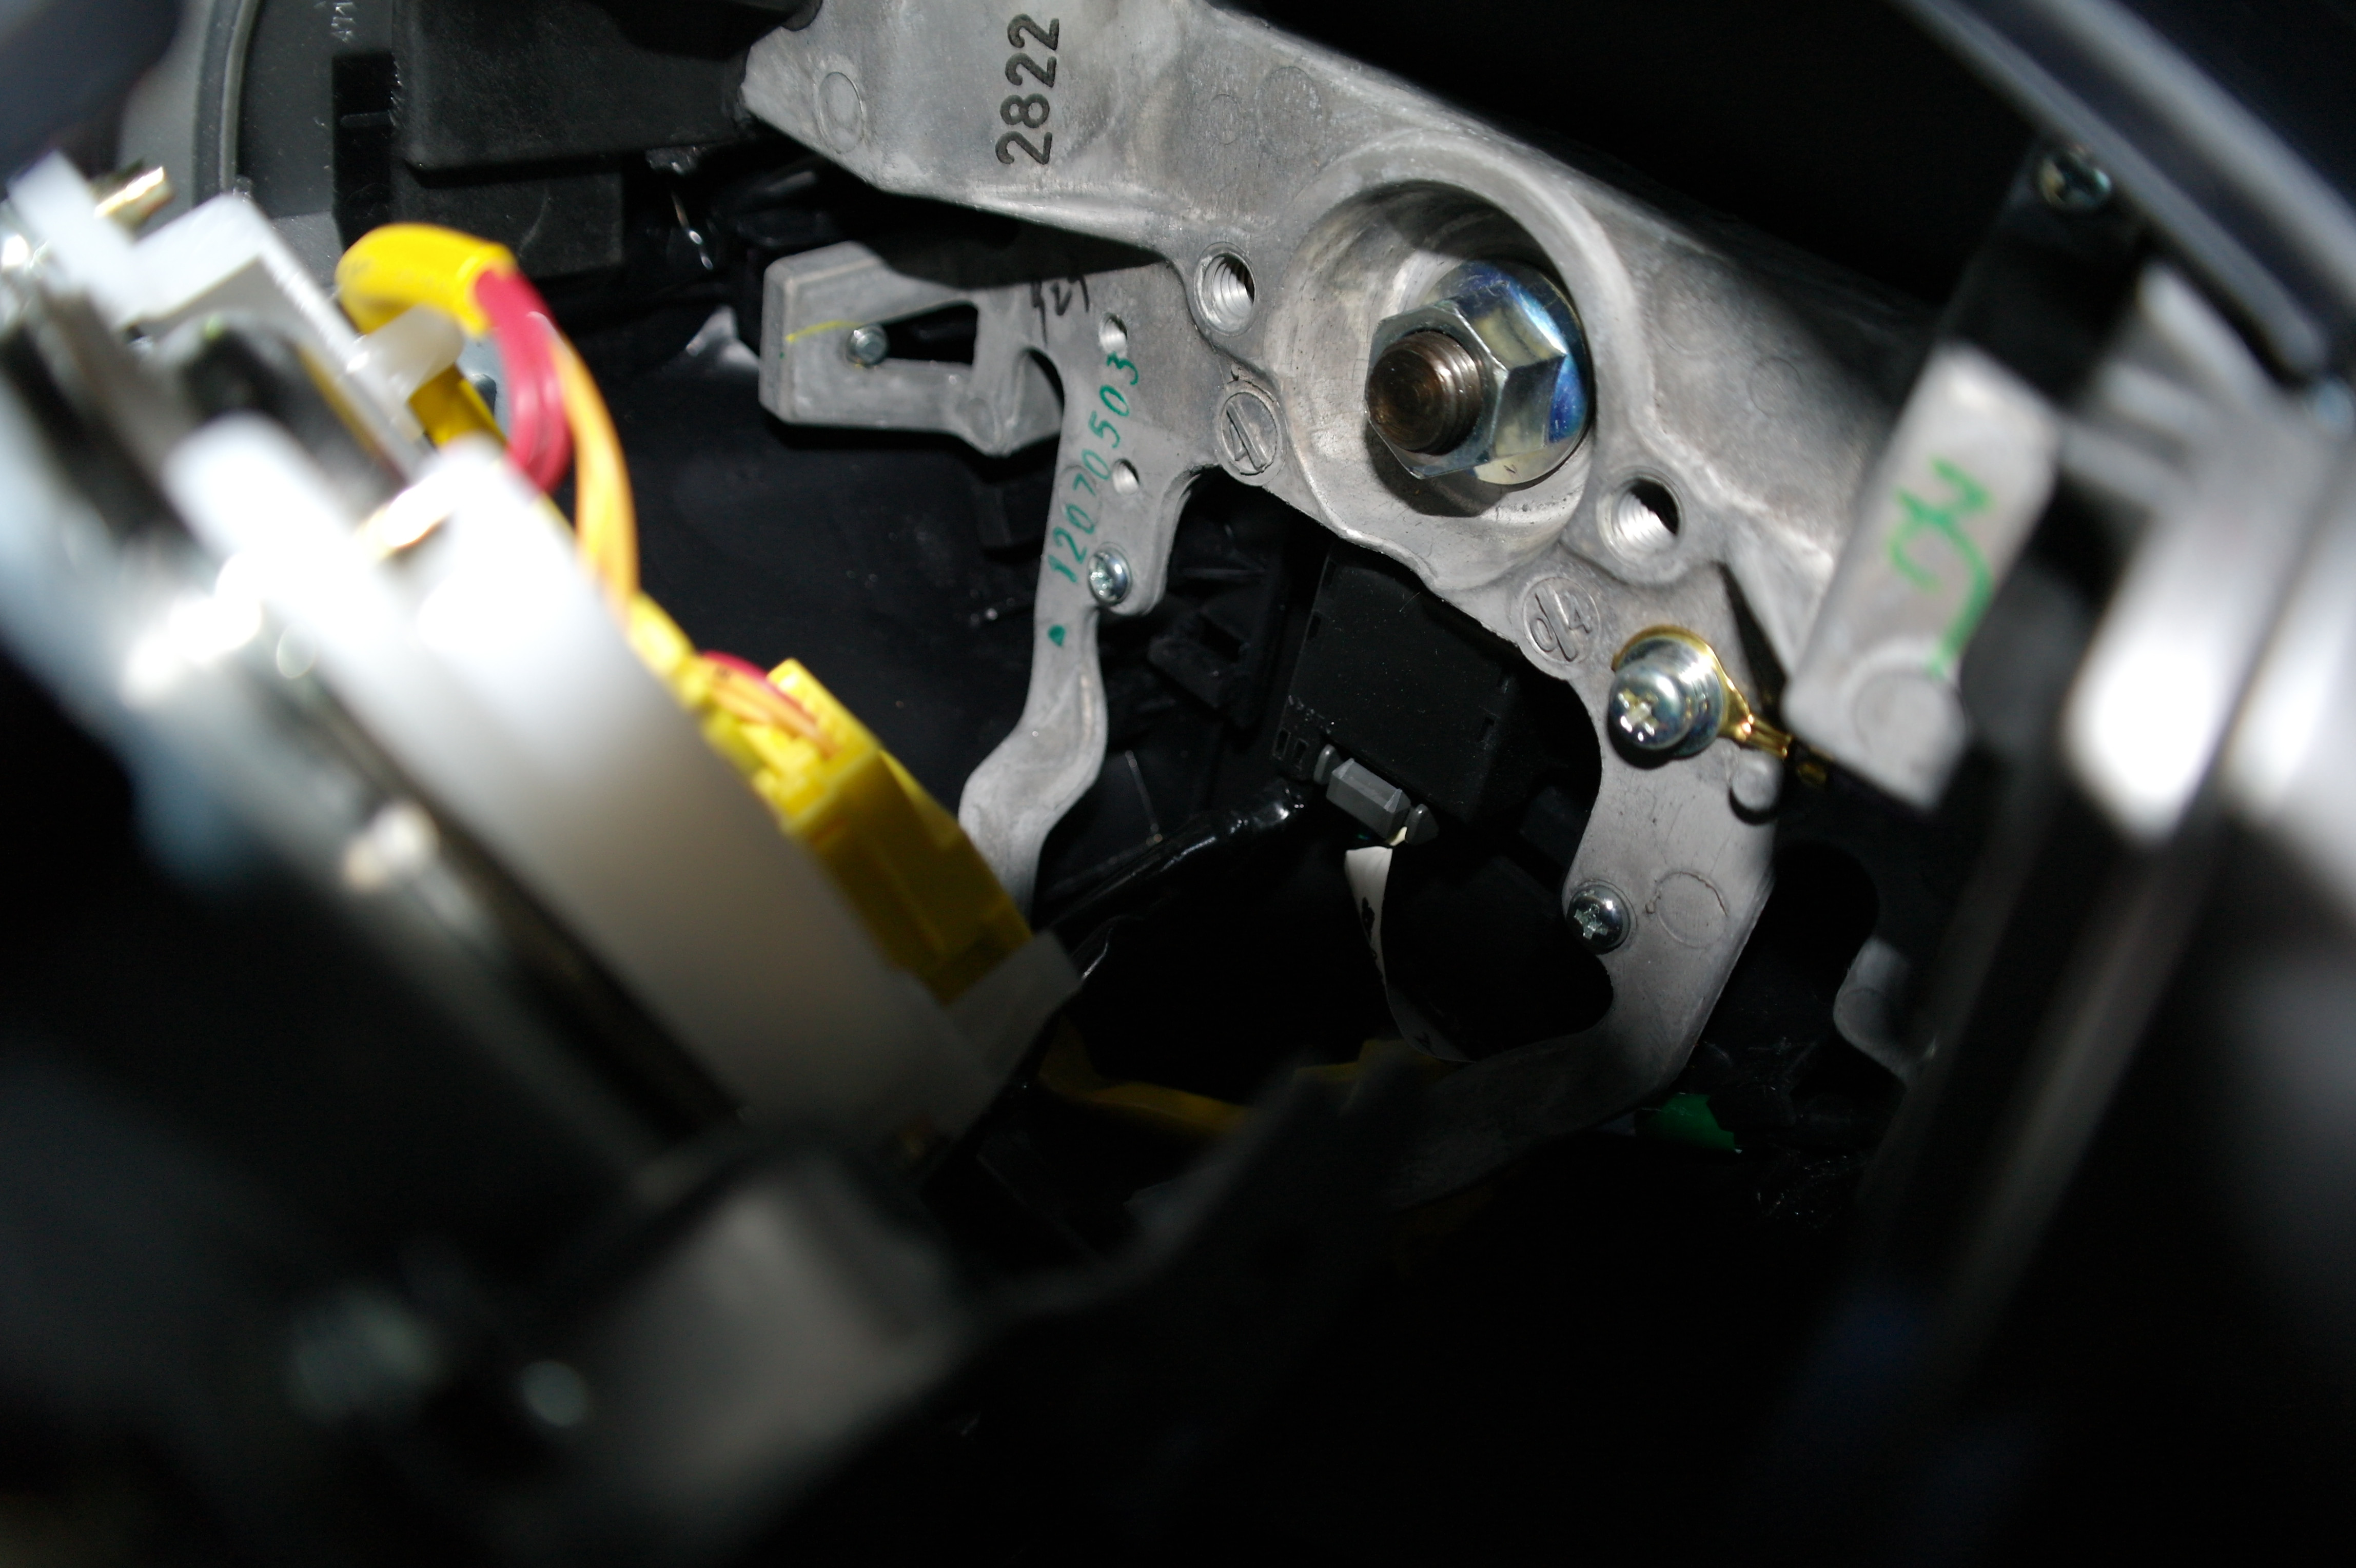
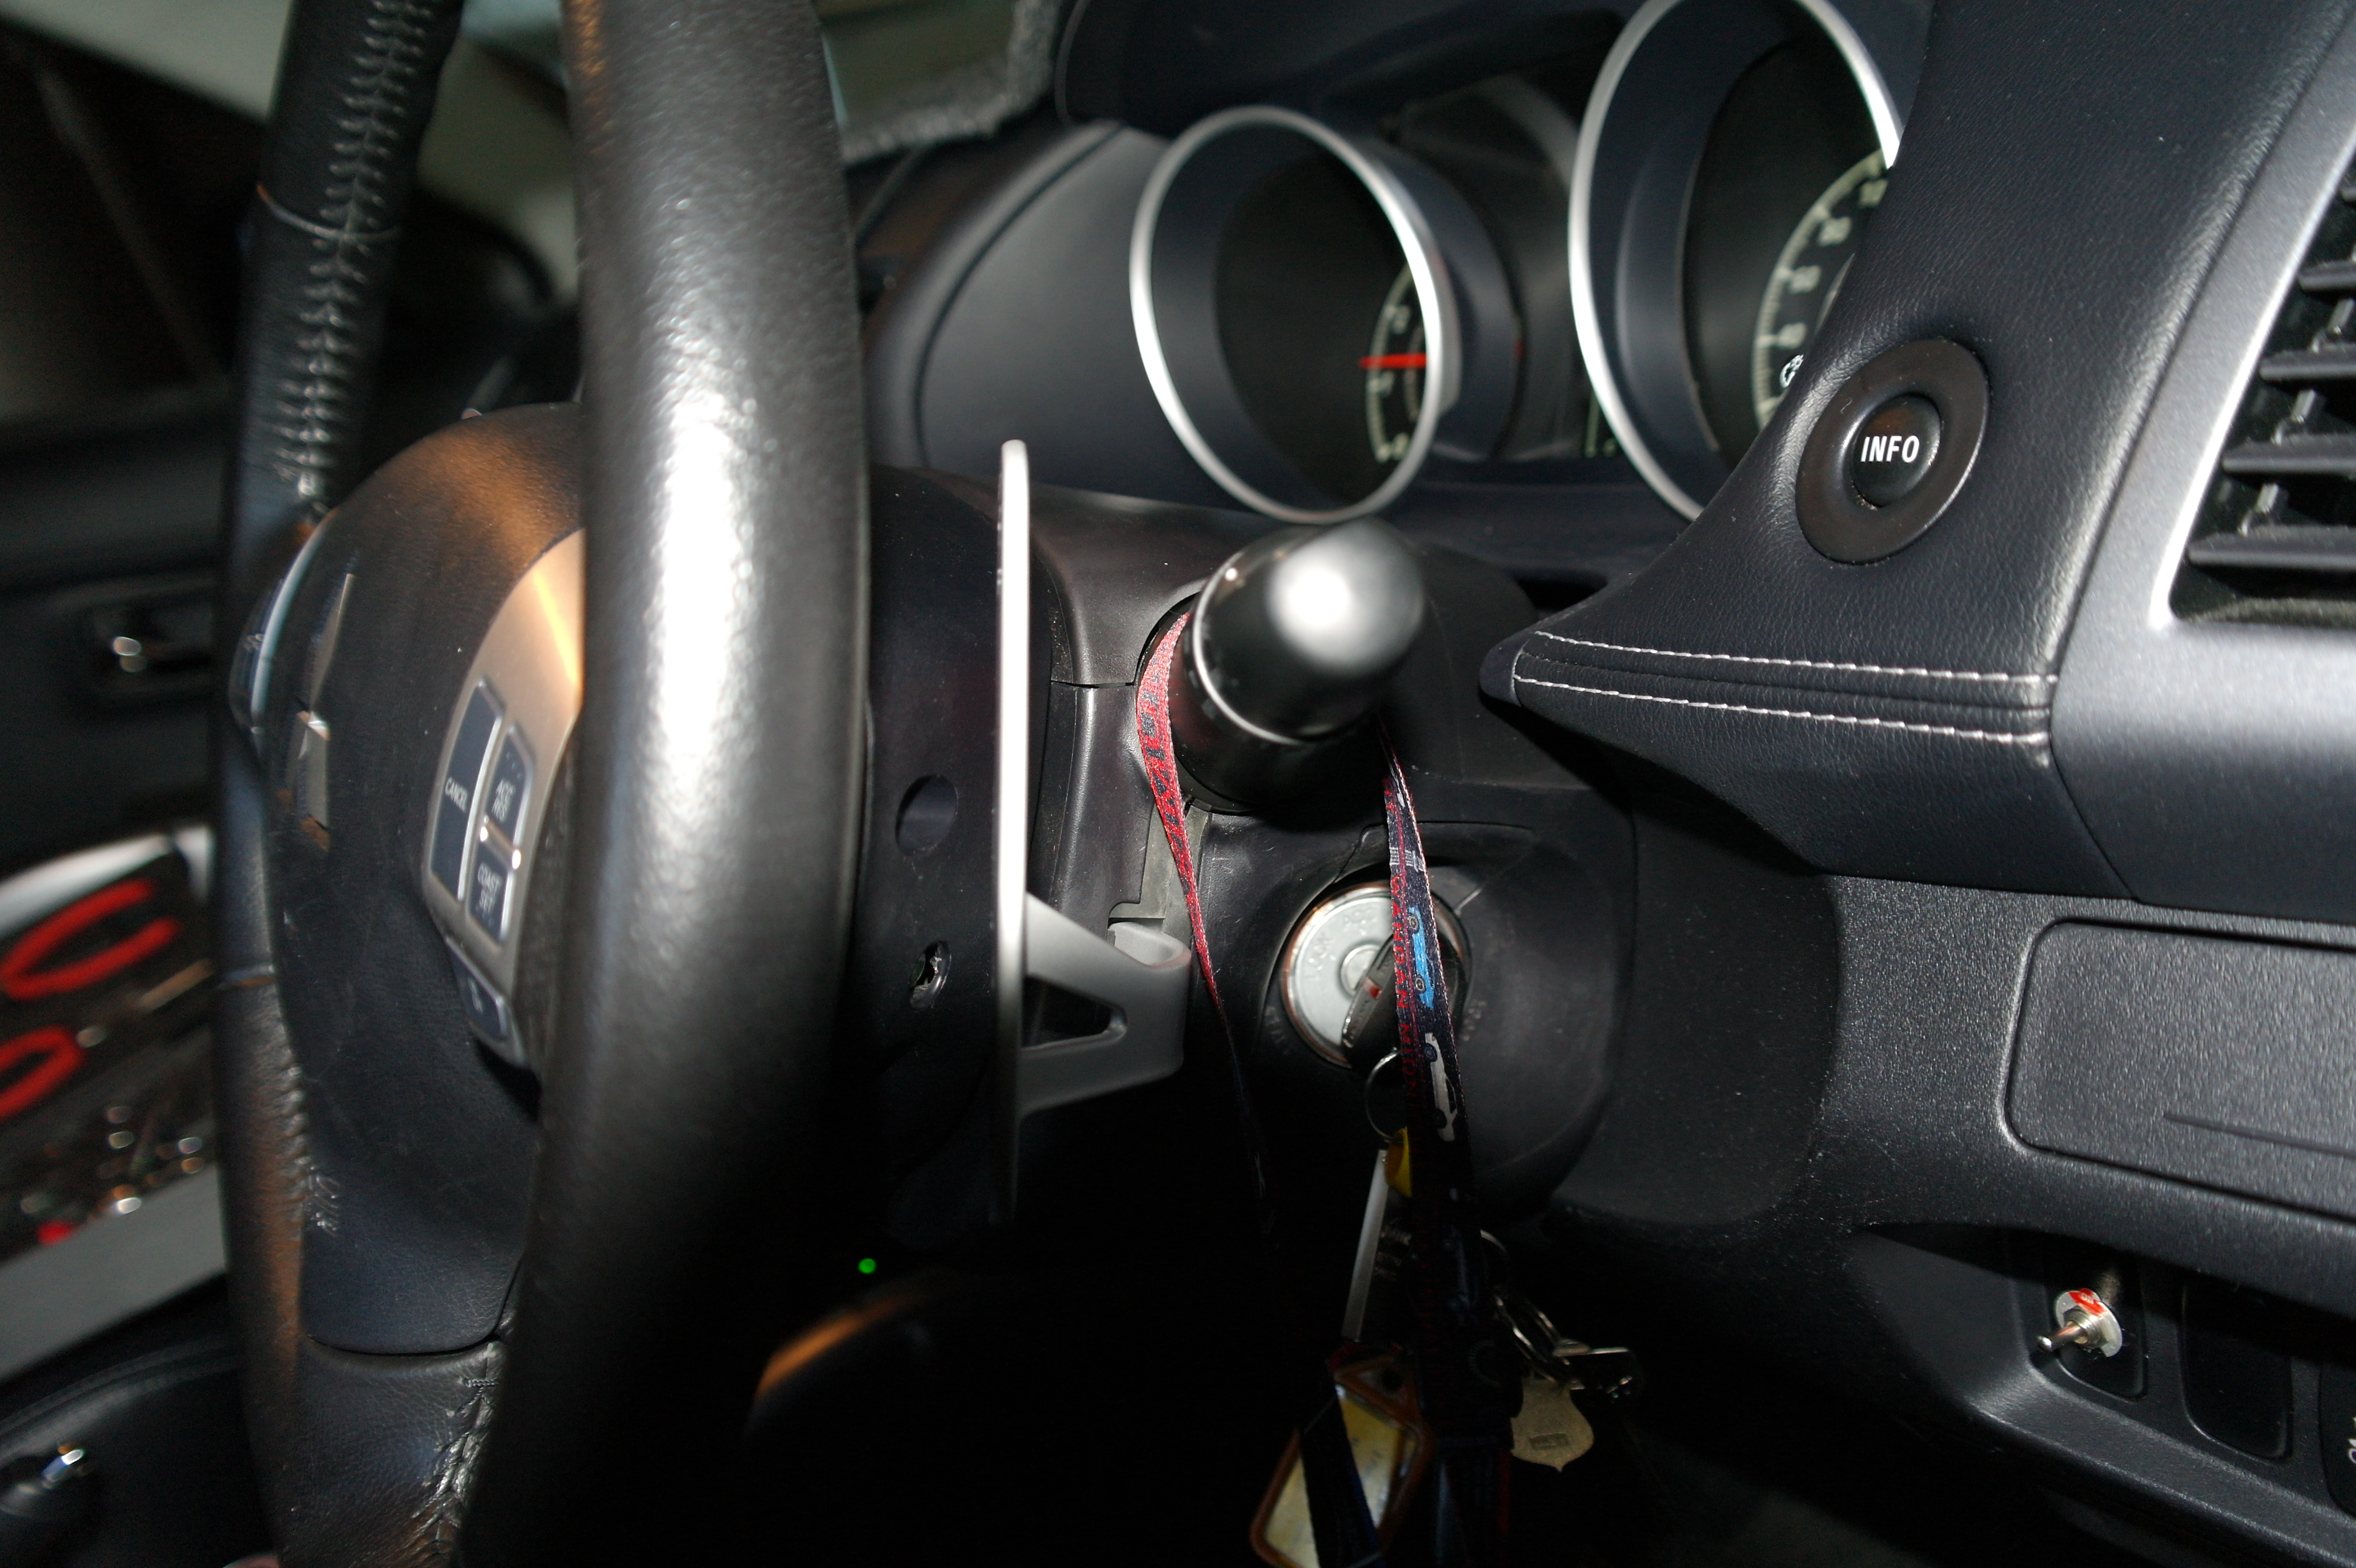
6. Use the 17mm socket (some extenders maybe needed to clear the steering wheel) to undo the nut holding on the steering wheel. Some force will be needed and your steering will need to be held straight (a steering wheel extractor can be used if you want). Undo the bolt and then place it back on about a turn, now shake the steering wheel till it becomes loose, then remove the nut and the steering wheel.
7. Unscrew the two Philips screws from the bottom steering column cover (these will be reused) and unclip the covers from each over and remove them. This may take some time and be careful of the steering height adjustment leaver getting in the way.
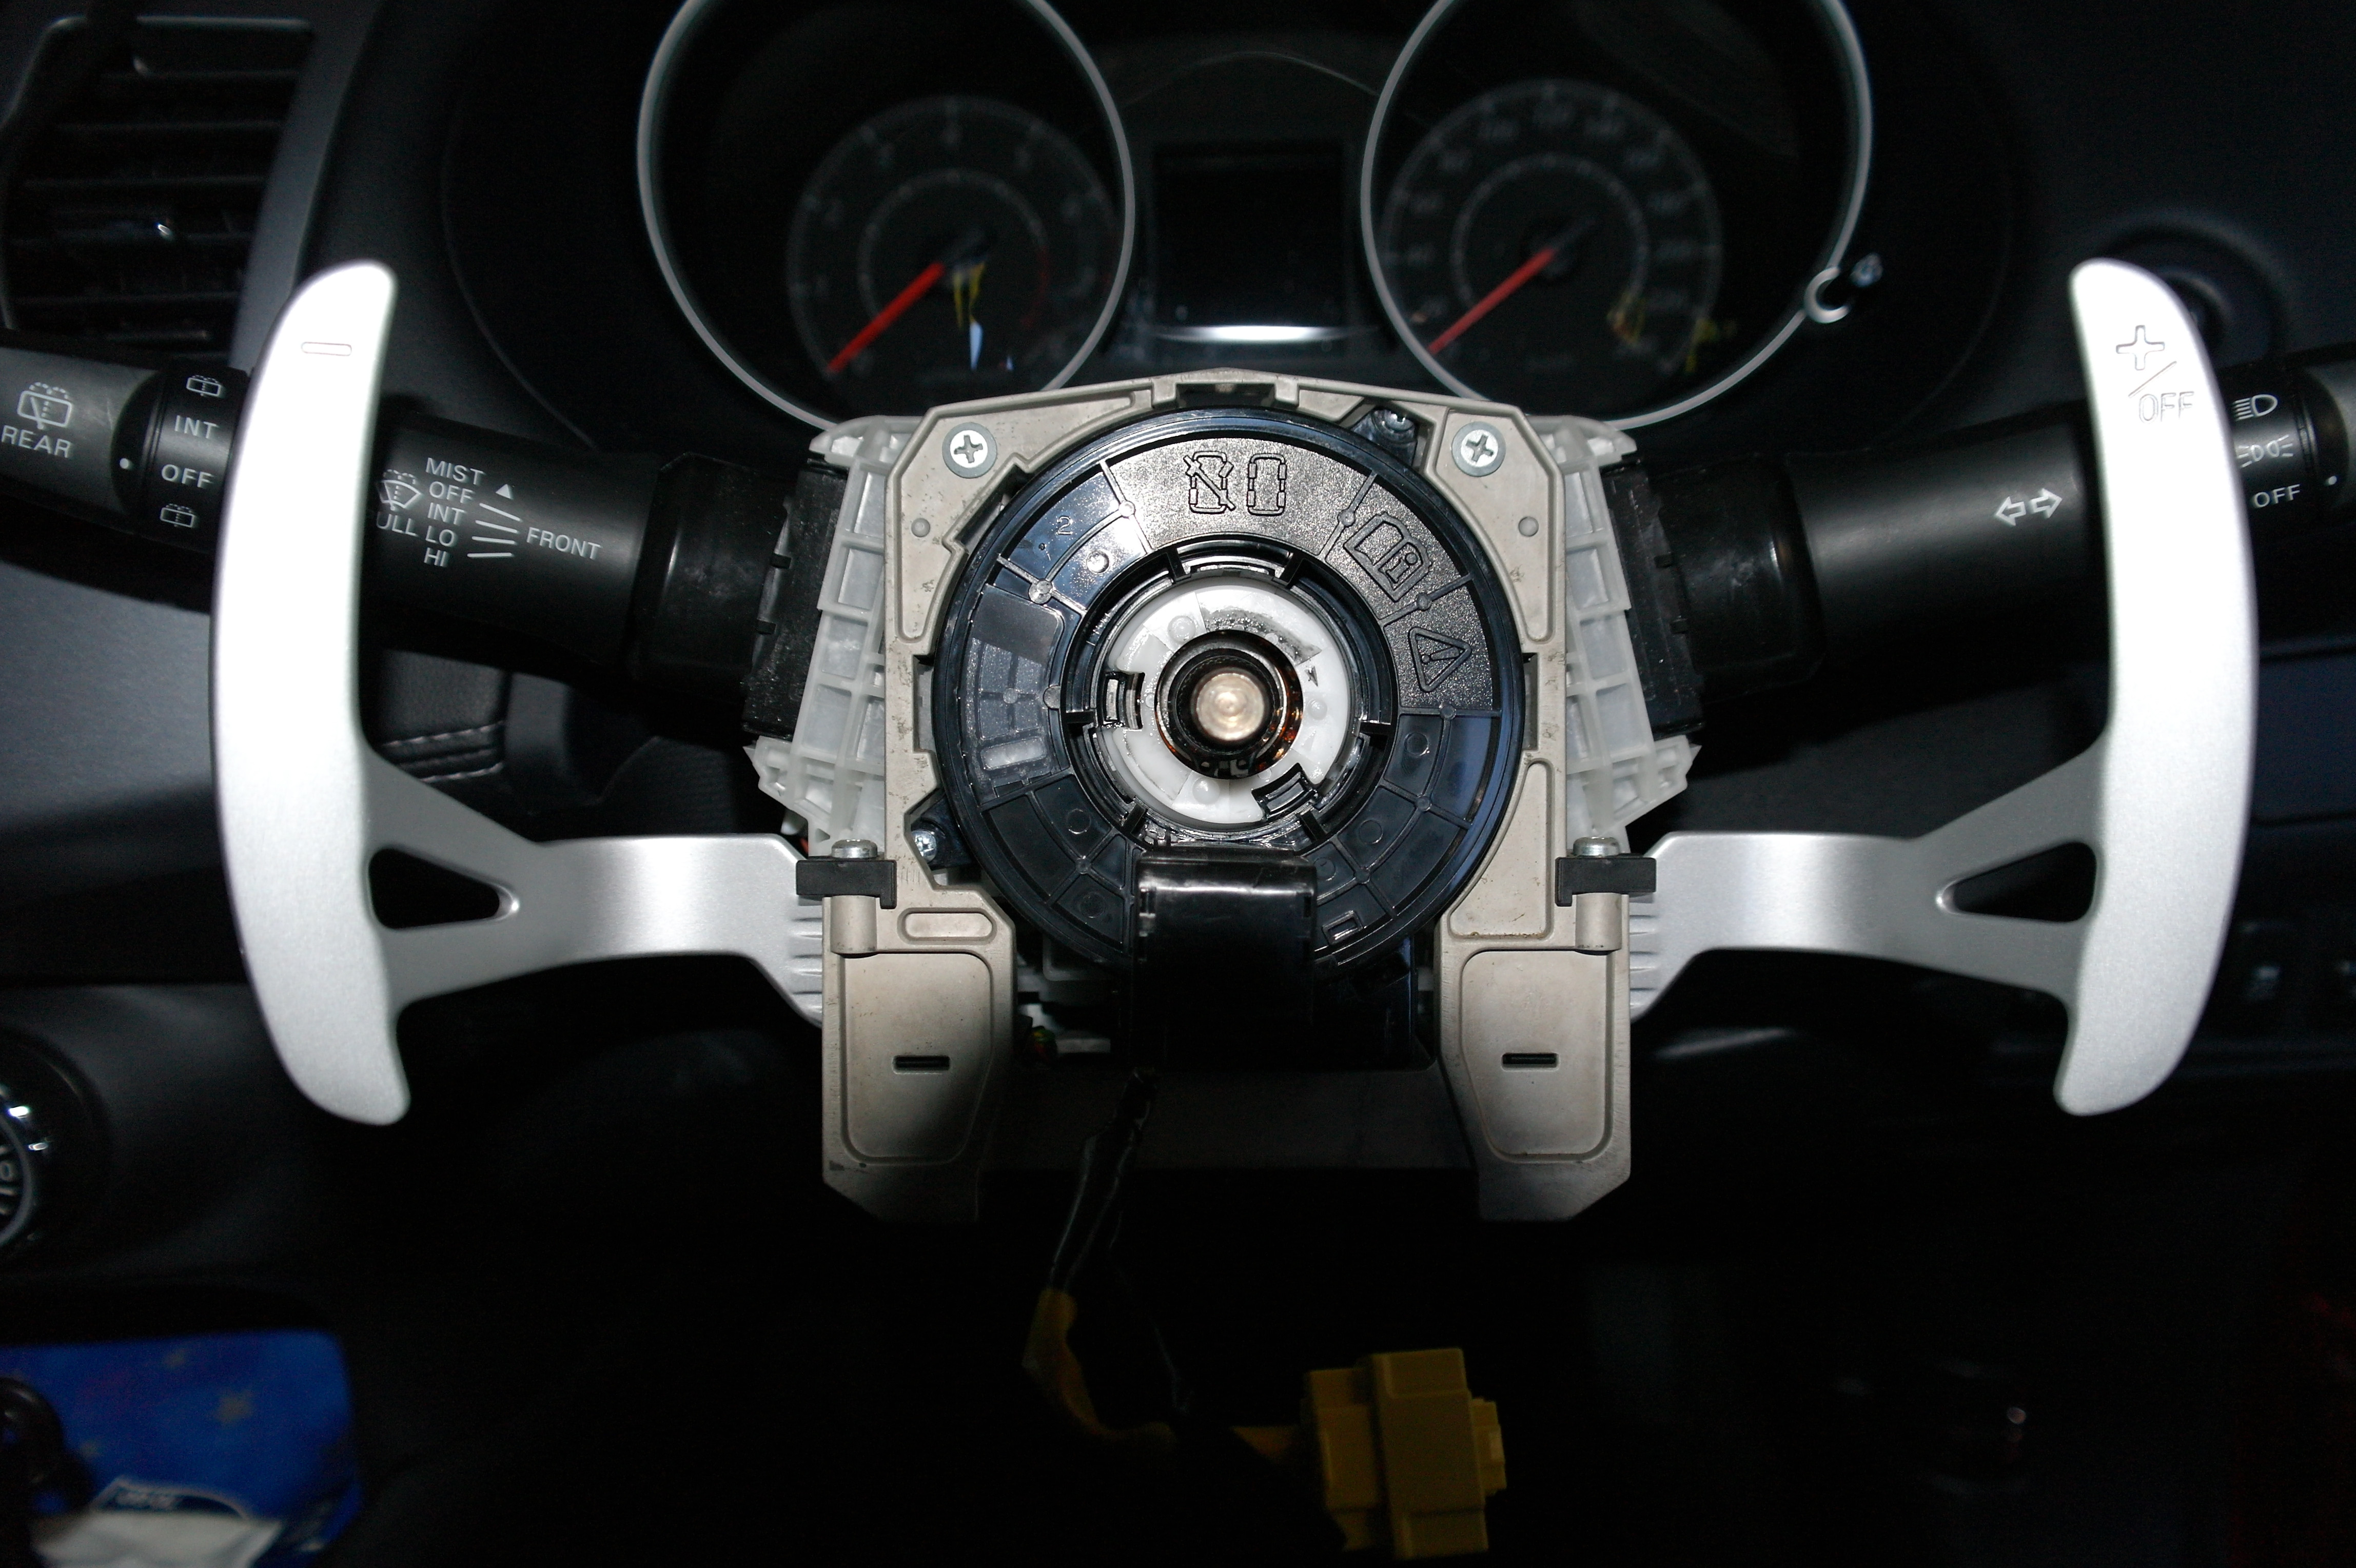
8. You should now be able to to see the plug electrical taped to some other wires (My tape was blue). Cut or unwind the tape so the plug is free to be moved. Ensure that the clock spring is aligned. there should be a small arrow near the bottom that should line up to an arrow on the part behind it.
9. Place the Paddle Shifter Assembly over the clock spring (making sure it stays aligned) and insert the blots into the smaller holes at the bottom (they should light up to holes in the column) and insert the screws to the holes at the top. Make sure all these are tight.
10. Place the steering wheel back on and tighten the 17mm nut. Just remember that this is holding your steering wheel on so make sure it's tight.
11. Plug the grey plug back into the clock spring, the black plug on the back of the airbag and the yellow plug into it's slot.
12. Push the air bag into place and tighten the T30 screws.
13. Place the Negative terminal back on the battery and tighten it. Adjust your in-car clock and your stereo EQ settings (if you had adjusted your EQ settings).
14. Enjoy your new paddle shifters and go for a drive to make sure it all works.
The shifters work by basically placing you in triptronic when you use them and are in drive, holding the + for 5 seconds or coming to a stop should place you back in drive. If you are in triptronic you will stay in triptronic.
Tools / Materials
- 2 x M6 WT8.8 25mm High Tensile Bolts
- 2 x Self Tapping 10G 3/4 Inch Screws
- Paddle Shifter Assembly (Lancer, Outlander, ASX/RVR/Outlander Sport, Evo
X) (MI-2401A004 SWITCH ASSY-A/T SHIFT RANGE)
- Bottom Steering Column Cover (Same models as shifter assembly, though must have slits for the shifters) (MI-8065A039XA COVER-STRING COLUMN-LWR(BLACK))
- T30 Bit
- 17mm Socket
- Flat Screwdriver (for pooping off trims)
- Philips Screwdriver
Method
1. Make sure your wheels are straight. Remove the Negative Terminal from the battery.
2. Remove cover from bottom of the steering wheel and disconnect the airbag plug (Yellow) It has a cover style sliding mechanism. It is pull the top back and then pull it out. (People with larger hands may struggle, but with some patients you will get it)
3. Unscrew the T30 Torx screws, the air bag cover or horn should be lose once it is fully undone, do not remove it from the hole as it is very time consuming to get it back in and does not need to be removed completely.
4. The airbag will now be moveable. Pull it out and then remove the small black plug from the back of the airbag.
5. Remove the grey plug from the bottom of the clock spring.
6. Use the 17mm socket (some extenders maybe needed to clear the steering wheel) to undo the nut holding on the steering wheel. Some force will be needed and your steering will need to be held straight (a steering wheel extractor can be used if you want). Undo the bolt and then place it back on about a turn, now shake the steering wheel till it becomes loose, then remove the nut and the steering wheel.
7. Unscrew the two Philips screws from the bottom steering column cover (these will be reused) and unclip the covers from each over and remove them. This may take some time and be careful of the steering height adjustment leaver getting in the way.
8. You should now be able to to see the plug electrical taped to some other wires (My tape was blue). Cut or unwind the tape so the plug is free to be moved. Ensure that the clock spring is aligned. there should be a small arrow near the bottom that should line up to an arrow on the part behind it.
9. Place the Paddle Shifter Assembly over the clock spring (making sure it stays aligned) and insert the blots into the smaller holes at the bottom (they should light up to holes in the column) and insert the screws to the holes at the top. Make sure all these are tight.
10. Place the steering wheel back on and tighten the 17mm nut. Just remember that this is holding your steering wheel on so make sure it's tight.
11. Plug the grey plug back into the clock spring, the black plug on the back of the airbag and the yellow plug into it's slot.
12. Push the air bag into place and tighten the T30 screws.
13. Place the Negative terminal back on the battery and tighten it. Adjust your in-car clock and your stereo EQ settings (if you had adjusted your EQ settings).
14. Enjoy your new paddle shifters and go for a drive to make sure it all works.
The shifters work by basically placing you in triptronic when you use them and are in drive, holding the + for 5 seconds or coming to a stop should place you back in drive. If you are in triptronic you will stay in triptronic.

Member
Joined: Mar 2014
Posts: 56
From: Brisbane, QLD, Australia
Weird, seems that some '12 LS's have them, some don't (from pics I can find on google). Another one of those mystery additions; on the other hand your LS has fog lights, heated seats and backup camera? 
Thread Starter
|
Junior Member
Joined: Jun 2014
Posts: 7
From: Sydney, NSW, Australia
In Aus the LS never had the paddle shifters. The fog lights and back up camera are dealer fitted (my camera goes though the rear view mirror). But yes mine was ordered with leather heated seats.

Thread
Thread Starter
Forum
Replies
Last Post
Outie_NZ
Mitsubishi Outlander
15
Jan 25, 2025 05:55 AM
abefroman
Mitsubishi Lancer and Lancer Sportback
0
May 12, 2010 10:11 PM