
Sub-Box Walkthrough


Thread Starter
|
Senior Member
Joined: Jul 2005
Posts: 2,891
From:
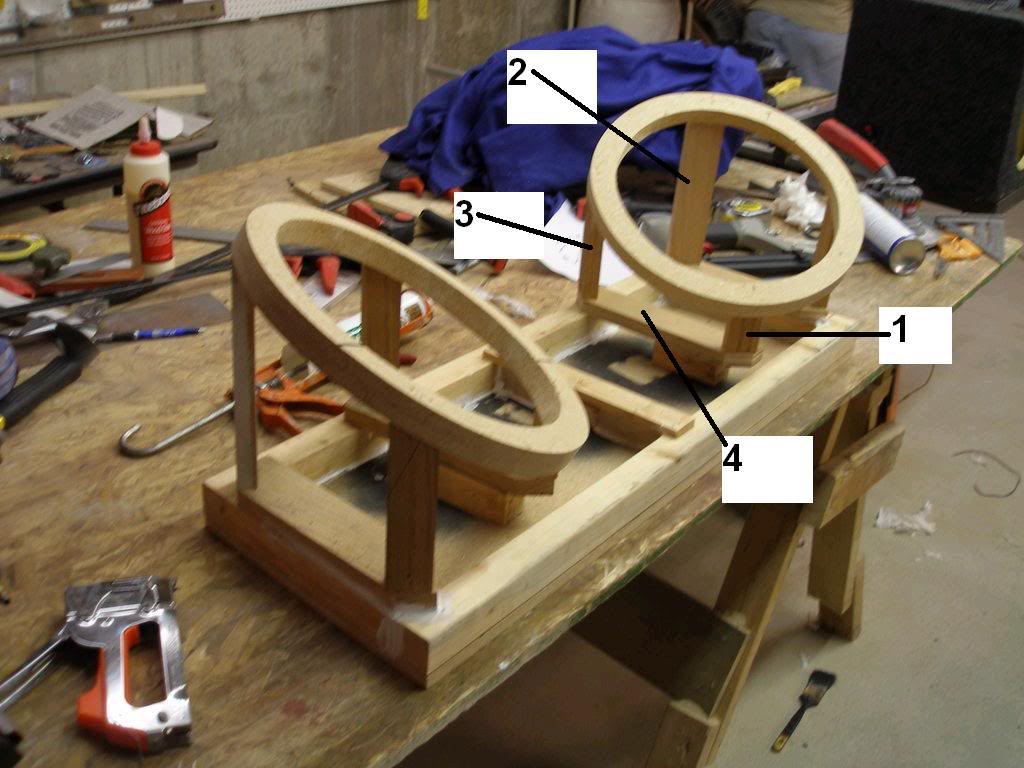
guys don't clutter up this thread please... and alzuben... i used a chop saw to get the angles... all i did was make the rings, had someone hold one of them in the car at the angle thati wanted (rough estimate), and measured the bottom of the ring (closest to floor) and the top of the ring (highest point of substands)... Thats why I said you just need to be creative, it all depends on what you think looks good and what height and angle you want your speakers to sit. After i got the two measurements, i cut both pieces, 1)one small and 2)one big, attached them to the ring, then set it on a flat surface to measure the 3)side pillars (See picture for markings. From there I just cut two peices of basically scrap wood for the 4)bottom support/lifters and attached them to the pillars. I then made the same size/angled pillars for the other ring, took them both and set them in the trunk, spaced them apart from eachother to where i wanted them, measured that, and then went inside and made the baseframe. The way they are tilted in towards eachother has no effect on how the angles were cut, all you do is spin the substand inward. Haha, dude you're making this too hard on yourself. Basically, the only measurements i had for the pillars was the height, the angle i "guessed" on, and just cut that same angle on the other pillars, that simple.
Also Bestwiseguy, I'm not a huge fan of the system either... but my bro gave me the subs for free (they're the oldschool ones which are the best that orion has made, and they were BARELY used, so I couldn't pass up those for free... then I was on a limited college budget and got the amp for 170 off etronics.com... if I was keeping the car I would definitely get a better system for it. Either way to do hit pretty hard, they're dual voice coil subs and sound pretty good, ESPECIALLY FOR BEING FREE!! haha
Also Bestwiseguy, I'm not a huge fan of the system either... but my bro gave me the subs for free (they're the oldschool ones which are the best that orion has made, and they were BARELY used, so I couldn't pass up those for free... then I was on a limited college budget and got the amp for 170 off etronics.com... if I was keeping the car I would definitely get a better system for it. Either way to do hit pretty hard, they're dual voice coil subs and sound pretty good, ESPECIALLY FOR BEING FREE!! haha

Joined: Sep 2007
Posts: 342
From:
works for me. I like having my design in place before I start a project. I would have built the entire thing out of cardboard before I cut my first piece of wood. You should make up some templates and mass produce these for a little side cash.
On with the glassing!
On with the glassing!
Thread Starter
|
Senior Member
Joined: Jul 2005
Posts: 2,891
From:
i was actually thinking about that, my friend suggested that last night haha... like i said, this was the first time i did anything like this, so it was kind of just a wing it sort of project, im actually headin out right now to fiberglass it

Thread Starter
|
Senior Member
Joined: Jul 2005
Posts: 2,891
From:
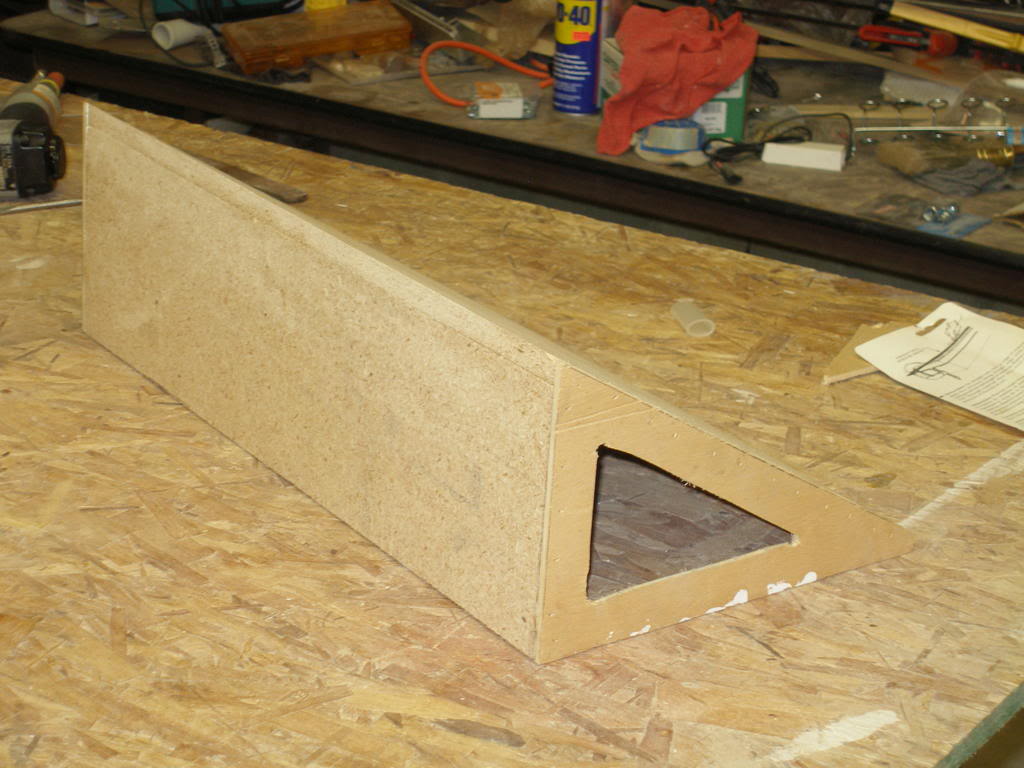
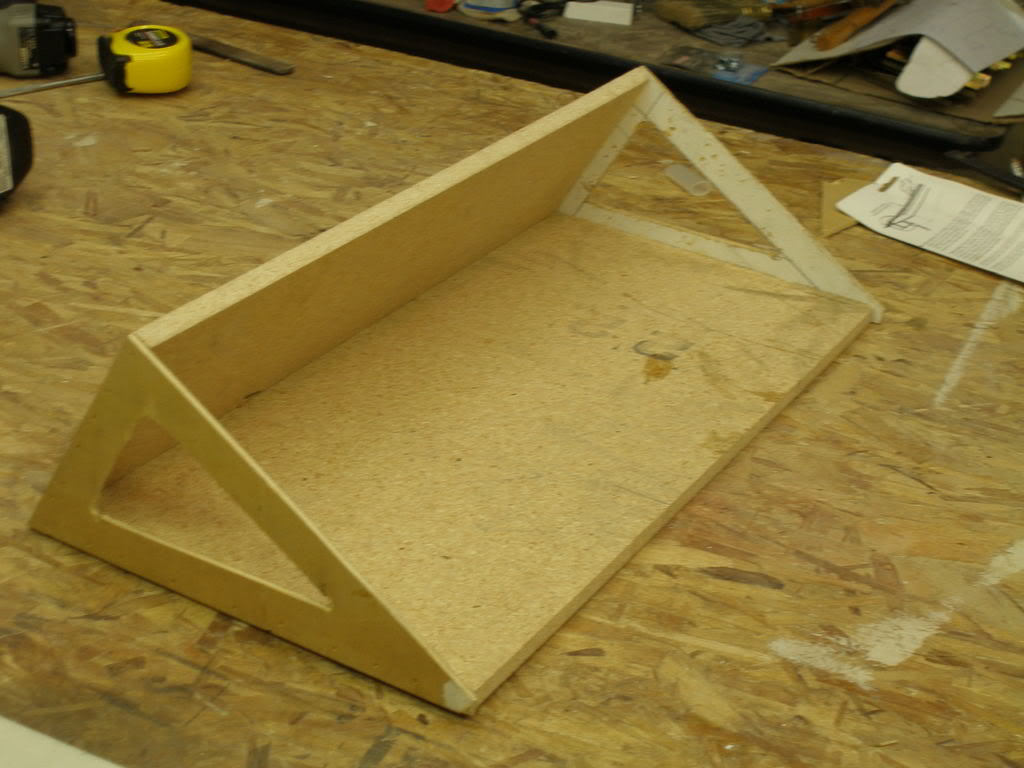
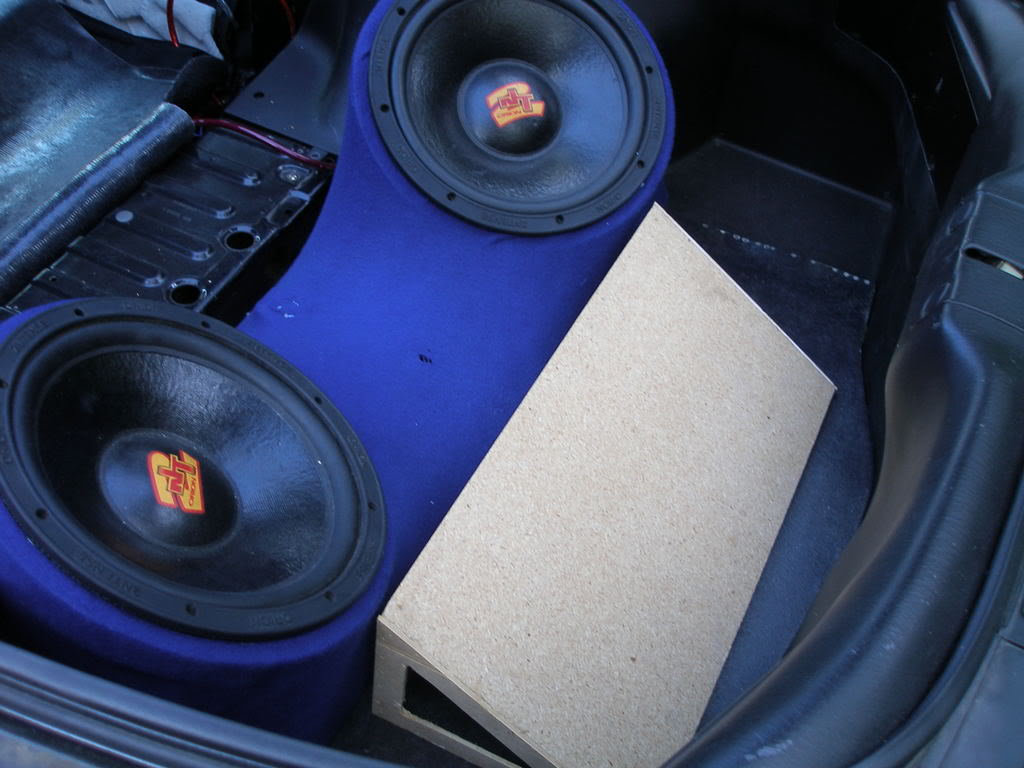
so i was about to fiberglass the box, when i realized that i should probably make the amp rack and test fit in there before i fiberglass anything (the amp is to big to just get drilled to the floor)... soi took some measurements (not doing a write-up on this cause everyone's amp is different) and started cuttin pieces, when i remembered that my friendhad givenme a 12" blue l.e.d. "neon" a looong time ago. and i've never had anyway to use it and i kinda just wanna get rid of it... so i had the thought "why not incorporate in the system somehow??" So check out the pics, you'll see that the two end pieces have holes cut out of them, and after i fiberglass this rack, i have plexiglass (already cut it) thats going to be glue to the inside of each hole. The light is goin to be mounted under the rack with a switch wired on the back of the box... so at night it should be pretty cool to light up the whole trunk.. here's the pics, NOW i'm gonna go fiberglass everything...


Thread Starter
|
Senior Member
Joined: Jul 2005
Posts: 2,891
From:
good deal, everythings all finally fiberglassed (subbox, amprack, and the crack in my bumper's all done too... i'd take pictures but there'd really be no point, it would look just like the pics before, only wet haha, i'll get stuff tomorrow as im sanding and bondoing